E-cards & Web Banners
 Easy Free E-cards -- Send an E-mail to Mar25Dec25ecard@DayOfTheUnbornChild.com to have our
dual-season Annunciation & Christmas e-card sent straight to your inbox to
forward as often as you like. For more
info and to view this card, an Easter-Annunciation card, carnation-themed Annunciation
e-cards, or a FirstDay!-Celebrate-Conception-Date e-card (and to print as note
or post cards) click HERE to skip to our E-card
section.
Easy Free E-cards -- Send an E-mail to Mar25Dec25ecard@DayOfTheUnbornChild.com to have our
dual-season Annunciation & Christmas e-card sent straight to your inbox to
forward as often as you like. For more
info and to view this card, an Easter-Annunciation card, carnation-themed Annunciation
e-cards, or a FirstDay!-Celebrate-Conception-Date e-card (and to print as note
or post cards) click HERE to skip to our E-card
section.
Add A Seasonal Banner To Your E-mails,
Blogging, & Website; Or Print As Signs, Stickers, Postcards, & Greeting
Cards/Banquet-Table-TentCards -- click HERE to PRINT
SAMPLER SHEETS of the banners/stickers below.
Many of the banners below can be used on
other holidays to show the link between the Annunciation and these special days
-- save or print our chronological year-round
listing of related dates that present special opportunities to promote the
import of March 25th. For an easy way
to share these graphics as the dates arrive see our page at facebook.com/AnnunciationDayMarch25 and Follow Us On Twitter
@March25info
The graphics/text banners below highlight the importance of celebrating
the Annunciation -- each focused on a particular aspect. The top two feature simple text and graphics
representing the events of the Annunciation/Incarnation -- the first banner presents the basics of the
Annunciation calling us to give thanks and celebrate, the second similar banner adds the date's selection
as Day of the Unborn Child. The Carnations for the Incarnation banner
encourages display of these lovely flowers as memorable symbols of Christ's
conception/Incarnation every year on Annunciation Day. The blackboard Annunciation banner is a
kid-friendly design in the style of a teacher's chalk pastel greeting that can
also be used at Christmas. The "2 Days 2 Celebrate" banner in bright sunny
colors presents the Annunciation as the gift of the Incarnation and Christmas
as the joyous "reveal." A
springtime theme and colors gives a backdrop to a banner for years the feast is moved
with a brief explanation of how the official Annunciation celebration can be
"transferred" one or more days due to Lent/Easter conflicts. The website invite banner
encourages a visit to the DayOfTheUnbornChild.com site with a summary of its
content.
The "9 Months 4 Life" Spiritual
Adoption banner covers most of the year encouraging prayer for the unborn
during the interval between the feasts.
A year-round "25th Of The Month Club"
banner encourages prayer focused on the Incarnation and pro-life activities
each 25th of the month.
Lent and Easter present a perfect opportunity to highlight the
historical connection between Annunciation and Good Friday (both were thought
to have occurred on March 25) -- use the
Easter-Good Friday-Annunciation Connection banner as a timely reminder to
celebrate both Christ's conception and resurrection as both holy days come in
the same season. Easter is still the
fourth most popular holiday to send greeting cards -- both the banner/notecards
and the Easter E-card
reinforce this tradition while introducing the Annunciation at a time of the
year open to faith topics.
The next three have traditional holiday colors and symbols perfect for
introducing the Annunciation into the Christmas/New Year's season: The
"A Blessed Annunciation + 9 Months = A Merry Christmas" banner
stresses the importance
of the Annunciation's relationship to Christmas and points out the true
meaning of Happy "Holidays" in the link between these two
"HolyDays." (See the e-card
section at bottom of web page for a dual-season Christmas/Annunciation card to
use in December and March). Another holiday season banner covers the
Christmas/New Year/Annunciation connection, and a rustic winter-themed banner
invites others to share the Annunciation's
NewYear/Christmas Connection and is well suited for November through
January mailings & social networking.
If it's too late to send Christmas greetings there is also a special Happy New Year banner with festive symbols for the
occasion and a brief history of New Year's Day.
After Christmas, New Year's and Easter, other days with a less obvious
connection can also present opportunities to share information on the
Annunciation, including to those who are not religiously oriented. The Mystery of
the Months banner can be used year-round but is especially relevant from
September to December and in January when the start of a new year piques
interest in calendar trivia and history, but if March 25th has just passed, the
April Fools' Day banner gives a cheerful
reminder of the Annunciation's historical connection with 1st of April
merriment -- the Calendar Quiz banner can be used
anytime but is perfect for April (Fools' Day through Tax Season as it notes the
Annunciation's link to both). These
previous three banners present an easy opportunity to mention the Annunciation
to those not generally open to a specifically religious message, while an
additional April Fools' Day/Be A Fool For
Christ banner is directed toward Christians. In addition, the interesting fact that Mary's conception and
birth feasts (Dec. 8 and Sep. 8) are also separated by a gestational nine
months makes both feast days a perfect time to highlight this interval in
connection with the nine month interval between Christ's conception and birth
feasts (Mar. 25 and Dec. 25) -- recognizing these intervals is an easy way to
remember the feasts' meaning so the December 8th feast of Mary's Immaculate
Conception will no longer be mistaken for the feast of Christ's
conception. Click here to see the Immaculate Conception banner
on this topic -- it can be used on both Dec. 8 and Sep. 8.
Banners for
Related Initiatives:
Many
life-affirming year-round initiatives are particularly appropriate for the
Annunciation feast. For example, two
banners reproduce this site's "Prayer to Christ
Unborn" and "Prayer to Christ In His
Hidden and Public Life" encouraging meditation on and devotion to
Christ's conception as the moment of Incarnation and reflection on his nine
months in Mary's womb -- both graphics though they can be used anytime, include
a mention of the March 25th feast date.
The tradition of celebrating Christ's conception and prenatal life
reminds us of the importance of our own conception and the validity of our life
before birth as a recognized phase of human development as legitimate as any
other stage--therefore the Annunciation feast is an ideal time to launch
outreach programs promoting recent initiatives such as "FirstDays" (celebration of Conception Dates -- also see E-card section,
bottom of webpage) and the "Plus Nine" or "+9"
campaign (a simple yet ingenious logo from the pro-life community in Malta
reminding us we are born 9 months old)--several banners that groups and
individuals can use for web or print applications (some that include a mention
of the Annunciation) appear below. The Remember 2 Think +9 banner in sherbet colors mentions
both Annunciation Day and FirstDays in connection with the pro-life "plus
nine" concept. The blacklight effect +9 banner adds the
line "You Matter From Conception" in neon-glow colors. The Happy
FirstDay banner mixes bright blues, greens and autumnal tones for a
cheerful energetic greeting, while the softer Celebrate
Your First Day banner gives a gentle reminder in quiet sun-washed natural
tones. The Celebrate FirstDays Like BirthDays
tropical party colors banner invites celebration with a brief explanation of
the FirstDay practice. The Acorn and Oak Tree--Happy First Day--Plus 9 banner
uses elementary school botany lessons as a common ground starting-point to
launch "First Day celebrations and Plus Nine awareness for all ages, while
the Count From Conception--Because You Count From
Conception banner emphasizes prenatal worth for kids via a monthly 9 month
count from FirstDay to Birthday.
Alternate date Annunciation banners
with background info are also included below for April 7th (the old
calendar date used by many Orthodox and related churches) and for the current and most common Transfer Date (in years when churches move the feast to avoid Lent/Easter
conflicts)~web banners for less commonly used dates to which some churches may
transfer the feast are available in the photos section of the Facebook page.
Scroll down to
view all the graphics and read more on promoting
the feast with banners with general instructions
and e-mail "signature" directions
plus tips on using the banner in websites, blogs and message boards. NOTE: All banners can be
printed as mailing seals/stickers, note-cards/postcards, and small placard and
tabletop tent signs (simply follow the directions under each image) -- the
banner top fold cards also double as tent cards for banquet and information
tables. You can also download an image
to use in home publishing/word processing programs -- just right click the
image and select "Save picture as" and select a location to save
it. (For
printable note/post card versions of our carnation flower e-cards click HERE.) (Signs that are text-only
featuring the history of the feast and large print "Prayer to Christ
Unborn" with instructions
on constructing a tent sign are available on our prayer
page.)
Not sure which banner to
use?--Print Sample Sheets with a variety on each page
The banners below can be printed in
sampler sheets that will print an assortment of images on one page -- Right-click the
following three links to save a file to print the images: HERE
for Annunciation/DayOfTheUnbornChild-focused banners ideal for March, or HERE
for banners for other Annunciation-related holidays that can be used as these various dates approach, or HERE
for year-round banners for related initiatives such as FirstDay conception
celebrations & "Plus 9" campaigns as well as prayers centered on
Christ's prenatal life -- all of which either mention Annunciation observances
directly or easily segue into discussions of the feast day's importance. Note:
to print stickers use full sheet labels or for best results
2"x4" 10-per-sheet Avery template 5163 labels (such as 18163 or
48863) -- you can also use plain paper and a sticker machine (high quality
smooth-finish papers printed in normal or best settings are preferable).
Our God Became Flesh At Mary's Yes Banner Illustrates the
Annunciation/Incarnation with a Proclaiming Angel and a Dove Symbolizing the
Holy Spirit Overshadowing Mary -- Noting the Relationship to New Year's Day
& Calling Us To Celebrate and Give Thanks 9 Months Before Christmas
[NOTE:
In addition to the web applications
described below, you can also download an MS Word template to print the graphic
as envelope seals/stickers or top-fold invitation-size note-cards/postcards. For stickers/seals right-click HERE
to save the file and print on Avery 48863 (or 5163-template) labels (available
at Wal-Mart and office supply stores), or try full sheet labels, or plain paper
with a sticker machine. For note-cards
right-click HERE
and save and print, then cut page in half between the images and fold each half
down; the same note-card file can print postcards--just print, then
flip/turn to print again in the blank half of sheet, and cut in quarters. For small signs (standard 8 1/2 x 11
in. size for bulletin boards, fliers, etc.) right-click HERE
and save and print (landscape orientation) on white paper or cardstock--click HERE
for instructions to make a stand-up tent-style sign for prayer card
displays and literature/refreshment tables.]
HTML Code: To insert the banner
above linked or un-linked directly with HTML, select/highlight the entire
code-string in the appropriate text box below by clicking/dragging your mouse,
(or use Shift and the cursor arrows) -- then right click and choose COPY. Then to insert, right click and PASTE. (See instructions
below for details).
HTML
code for linked version of the banner above is as follows:
<A
href="http://dayoftheunbornchild.com/"
target="new"><IMG height=206
src="http://dayoftheunbornchild.com/AnnunciationBanner_GodBecameFleshAtMarysYes.jpg"
width=397 border=0></A>
HTML
code for un-linked version of the banner above is as follows:
<A><IMG height=206
src="http://dayoftheunbornchild.com/AnnunciationBanner_GodBecameFleshAtMarysYes.jpg"
width=397 border=0></A>
Text
Used in Graphic (can be used with translation tools):
"THE ANNUNCIATION AND INCARNATION: God Became
Flesh, At Mary's Yes ~ MARCH 25th ~ Celebrate And Give Thanks, 9 Months Before
Christmas: FEAST OF CHRIST'S CONCEPTION / THE OLD NEW YEAR'S DAY"
Our God Became Flesh When Mary Said Yes Banner Depicts the
Annunciation/Incarnation with Angel, Symbolic Dove, and Mary -- Noting the
Relationship to New Year's Day, Christmas and as Day of the Unborn Child
[NOTE:
In addition to the web applications described below, you can also
download an MS Word template to print the graphic as envelope seals/stickers or
top-fold invitation-size note-cards/postcards.
For stickers/seals right-click HERE
to save the file and print on Avery 48863 (or 5163-template) labels (available
at Wal-Mart and office supply stores), or try full sheet labels, or plain paper
with a sticker machine. For note-cards
right-click HERE
and save and print, then cut page in half between the images and fold each half
down; the same note-card file can print postcards--just print, then
flip/turn to print again in the blank half of sheet, and cut in quarters. For small signs (standard 8 1/2 x 11
in. size for bulletin boards, fliers, etc.) right-click HERE
and save and print (landscape orientation) on white paper or cardstock--click HERE
for instructions to make a stand-up tent-style sign for prayer card
displays and literature/refreshment tables.]
HTML Code: To insert the banner above linked or
un-linked directly with HTML, select/highlight the entire code-string in the
appropriate text box below by clicking/dragging your mouse, (or use Shift and
the cursor arrows) -- then right click and choose COPY. Then to insert, right click and PASTE. (See instructions
below for details).
HTML
code for linked version of the banner above is as follows:
<A
href="http://dayoftheunbornchild.com/"
target="new"><IMG height=206 src="http://dayoftheunbornchild.com/AnnunciationBanner_GodBecameFleshWhenMarySaidYes_DayOfTheUnbornChild.jpg"
width=397 border=0></A>
HTML
code for un-linked version of the banner above is as follows:
<A><IMG height=206
src="http://dayoftheunbornchild.com/AnnunciationBanner_GodBecameFleshWhenMarySaidYes_DayOfTheUnbornChild.jpg"
width=397 border=0></A>
Text
Used in Graphic (can be used with translation tools):
"THE
ANNUNCIATION AND INCARNATION: God Became Flesh, When Mary Said Yes~MARCH
25th~The Old New Year's Day, 9 Months Before Christmas: FEAST OF CHRIST'S
CONCEPTION / DAY OF THE UNBORN CHILD"
Carnations for the
Incarnation
banner the graceful art nouveau style encourages churches and individuals to
display these lovely flowers as memorable symbols of Christ's
conception/Incarnation every year on Annunciation Day
[NOTE: In addition to the web applications
described below, you can also download an MS Word template to print the graphic
as envelope seals/stickers or top-fold invitation-size note-cards/postcards. For stickers/seals right-click HERE
to save the file and print on Avery 48863 (or 5163-template) labels (available
at Wal-Mart and office supply stores), or try full sheet labels, or plain paper
with a sticker machine. For note-cards
right-click HERE
and save and print, then cut page in half between the images and fold each half
down; the same note-card file can print postcards--just print, then
flip/turn to print again in the blank half of sheet, and cut in quarters. For small signs (standard 8 1/2 x 11
in. size for bulletin boards, fliers, etc.) right-click HERE
and save and print (landscape orientation) on white paper or cardstock--click HERE
for instructions to make a stand-up tent-style sign for prayer card
displays and literature/refreshment tables.]
HTML Code: To insert the banner above linked or
un-linked directly with HTML, select/highlight the entire code-string in the
appropriate text box below by clicking/dragging your mouse, (or use Shift and
the cursor arrows) -- then right click and choose COPY. Then to insert, right click and PASTE. (See instructions
below for details).
HTML
code for linked version of the banner above is as follows:
<A
href="http://dayoftheunbornchild.com/"
target="new"><IMG height=206
src="http://dayoftheunbornchild.com/CarnationsForTheIncarnationMarch25AnnunciationDay_Banner.jpg"
width=397 border=0></A>
HTML
code for un-linked version of the banner above is as follows:
<A><IMG height=206
src="http://dayoftheunbornchild.com/CarnationsForTheIncarnationMarch25AnnunciationDay_Banner.jpg"
width=397 border=0></A>
Text
Used in Graphic (can be used with translation tools):
Celebrate
March 25th with--Carnations for the Incarnation: Flowers like the poinsettia and lily symbolize holidays and the
carnation's name meaning color of flesh makes it a lovely reminder of the March
25th Annunciation feast of Christ's conception and Incarnation when the Word
was made flesh. Churches can display
and give out flowers and seeds on the day.
Families can make carnation cookies and Incarnation cards to send in
March. Blooms can be worn and grace the
dinner table reminding us to pray a special grace on this day 9 months before
Christmas in gratitude for the gift of the Incarnation and all unborn
children. For more ideas follow
@March25info
Blackboard Banner is Styled in Pastels on a Slate
Gray Background as a Teacher's Chalk "Annunciation Day" Greeting to
Students (With a Reminder of Its Relation to Christmas as One of the
"Happy HolyDays")
[NOTE: In addition to the web applications
described below, you can also download an MS Word template to print the graphic
as envelope seals/stickers or top-fold invitation-size
note-cards/postcards. For stickers/seals
right-click HERE
to save the file and print on Avery 48863 (or 5163-template) labels (available
at Wal-Mart and office supply stores), or try full sheet labels, or plain paper
with a sticker machine. For note-cards
right-click HERE
and save and print, then cut page in half between the images and fold each half
down; the same note-card file can print postcards--just print, then
flip/turn to print again in the blank half of sheet, and cut in quarters. For small signs (standard 8 1/2 x 11
in. size for bulletin boards, fliers, etc.) right-click HERE and
save and print (landscape orientation) on white paper or cardstock--click HERE
for instructions to make a stand-up tent-style sign for prayer card
displays and literature/refreshment tables.]
HTML Code: To insert the banner above linked or
un-linked directly with HTML, select/highlight the entire code-string in the
appropriate text box below by clicking/dragging your mouse, (or use Shift and
the cursor arrows) -- then right click and choose COPY. Then to insert, right click and PASTE. (See instructions
below for details).
HTML
code for linked version of the banner above is as follows:
<A
href="http://dayoftheunbornchild.com/"
target="new"><IMG height=206 src="http://dayoftheunbornchild.com/AnnunciationBannerBlackboardChalkHolyDaysGreeting.jpg"
width=397 border=0></A>
HTML
code for un-linked version of the banner above is as follows:
<A><IMG height=206 src="http://dayoftheunbornchild.com/AnnunciationBannerBlackboardChalkHolyDaysGreeting.jpg"
width=397 border=0></A>
Text
Used in Graphic (can be used with translation tools):
Q.
Dec. 25 - 9 Months = ?
A.
Mar. 25 (Annunciation Day):
Happy
Holy Days
Start
of the old New Year &
Feast
of the Incarnation
The
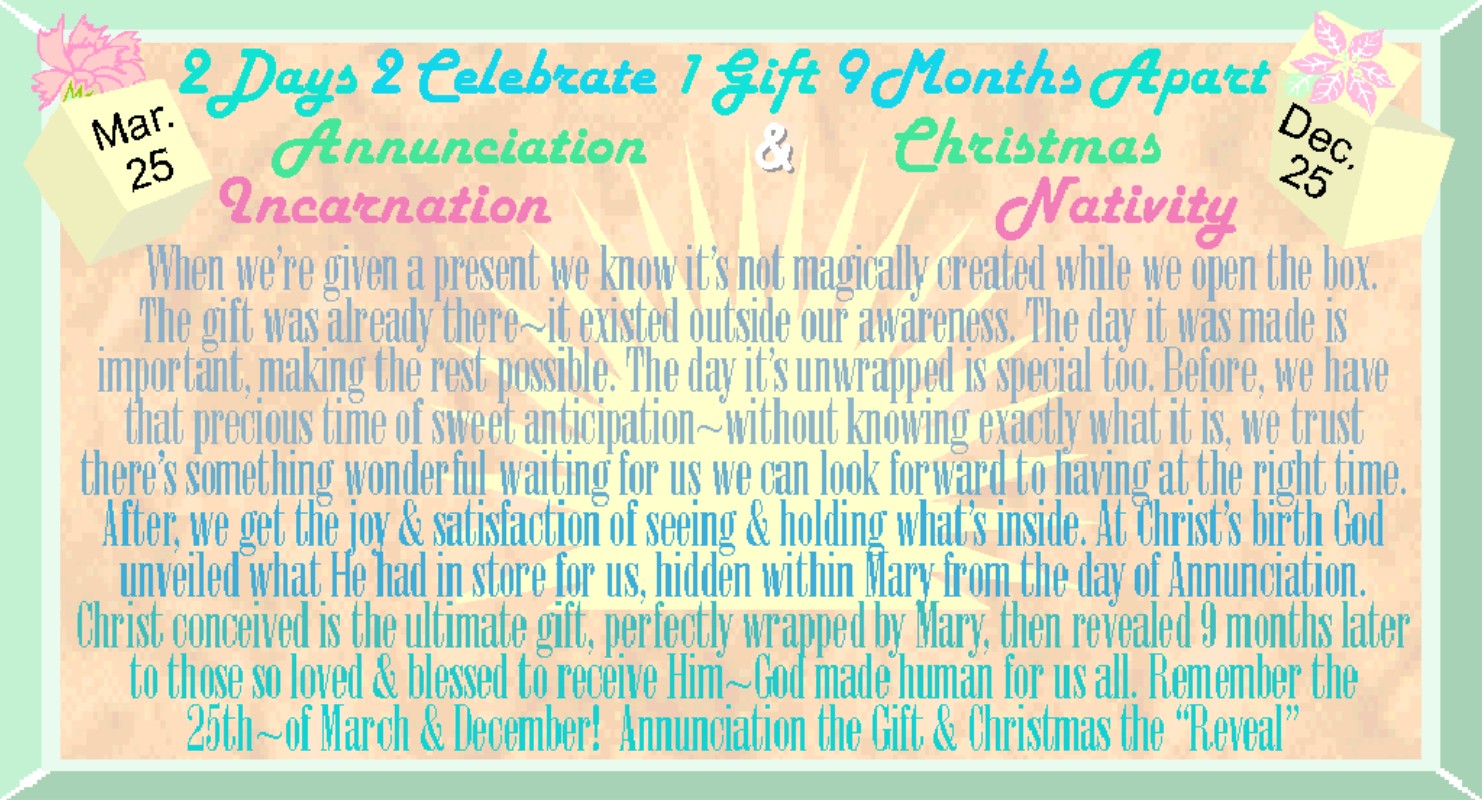
2 Days 2 Celebrate 1 Gift 9 Months Apart Banner in Bright Sunny Colors
Uses the Motif of Unopened & Opened Presents Decorated With Symbolic
Carnation & Poinsettia Bows to Present the Annunciation as the Ultimate
Gift of the Incarnation Revealed 9 Months Later at the First Christmas -- It
Can Be Used On Either Holiday.
[NOTE: In addition to the web applications
described below, you can also download an MS Word template to print the graphic
as envelope seals/stickers or top-fold invitation-size note-cards/postcards. For stickers/seals right-click HERE
to save the file and print on Avery 48863 (or 5163-template) labels (available
at Wal-Mart and office supply stores), or try full sheet labels, or plain paper
with a sticker machine. For note-cards
right-click HERE
and save and print, then cut page in half between the images and fold each half
down; the same note-card file can print postcards--just print, then
flip/turn to print again in the blank half of sheet, and cut in quarters. For small signs (standard 8 1/2 x 11
in. size for bulletin boards, fliers, etc.) right-click HERE
and save and print (landscape orientation) on white paper or cardstock--click HERE
for instructions to make a stand-up tent-style sign for prayer card
displays and literature/refreshment tables.]
HTML Code: To insert the banner above linked or
un-linked directly with HTML, select/highlight the entire code-string in the
appropriate text box below by clicking/dragging your mouse, (or use Shift and
the cursor arrows) -- then right click and choose COPY. Then to insert, right click and PASTE. (See instructions
below for details).
HTML
code for linked version of the banner above is as follows:
<A
href="http://dayoftheunbornchild.com/"
target="new"><IMG height=206 src="http://dayoftheunbornchild.com/AnnunciationTheGiftAndChristmasTheUnwrapping_Banner.jpg"
width=397 border=0></A>
HTML
code for un-linked version of the banner above is as follows:
<A><IMG height=206
src="http://dayoftheunbornchild.com/AnnunciationTheGiftAndChristmasTheUnwrapping_Banner.jpg"
width=397 border=0></A>
Text
Used in Graphic (can be used with translation tools):
Two
Days To Celebrate--1 Gift--9 Months Apart
Annunciation
& Christmas
March
25--Incarnation & Nativity--December 25
When
we’re given a present we know it’s not magically created while we open the
box. The gift was already there--it
existed outside our awareness. The day
it was made is important, making the rest possible. The day it’s unwrapped is special too. Before, we have that precious time of sweet anticipation--without
understanding exactly what it is, we trust there’s something wonderful waiting
for us we can look forward to having at the proper time. After, we get the joy and satisfaction of
seeing and holding what’s inside. At
Christ’s birth God revealed what He had in store for us, hidden within Mary
from the day of Annunciation. Think of
Christ conceived at the Annunciation as the ultimate gift, perfectly wrapped by
Mary and safely hidden for 9 months, then revealed at the first Christmas to
those so loved and blessed to receive Him--God made human for us all. Remember the 25th--of March and December!
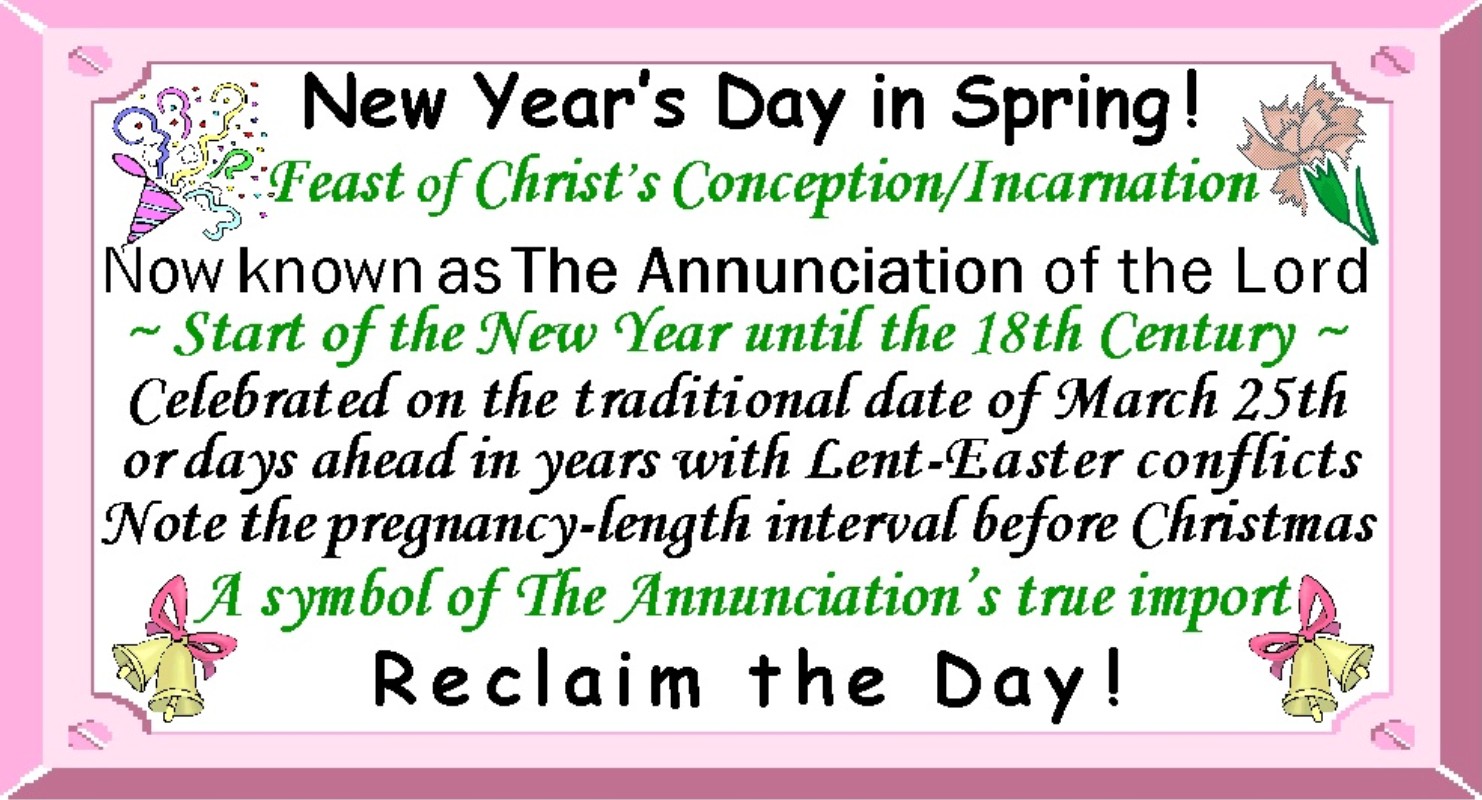
Transfer Year Annunciation
Banner for Any Year the Feast is Moved One or More Days--"New Year's Day
In Spring!~Reclaim the Day!" Banner Notes the Usual Feast Date and Reason
For the Change while Highlighting the Pregnancy-Length Interval Before
Christmas
[NOTE: In addition to the web applications
described below, you can also download an MS Word template to print the graphic
as envelope seals/stickers or top-fold invitation-size
note-cards/postcards. For stickers/seals
right-click HERE
to save the file and print on Avery 48863 (or 5163-template) labels (available
at Wal-Mart and office supply stores), or try full sheet labels, or plain paper
with a sticker machine. For note-cards
right-click HERE
and save and print, then cut page in half between the images and fold each half
down; the same note-card file can print postcards--just print, then
flip/turn to print again in the blank half of sheet, and cut in quarters. For small signs (standard 8 1/2 x 11
in. size for bulletin boards, fliers, etc.) right-click HERE and save
and print (landscape orientation) on white paper or cardstock--click HERE
for instructions to make a stand-up tent-style sign for prayer card
displays and literature/refreshment tables.]
HTML Code: To insert the banner above linked or
un-linked directly with HTML, select/highlight the entire code-string in the
appropriate text box below by clicking/dragging your mouse, (or use Shift and
the cursor arrows) -- then right click and choose COPY. Then to insert, right click and PASTE. (See instructions
below for details).
HTML
code for linked version of the banner above is as follows:
<A
href="http://dayoftheunbornchild.com/"
target="new"><IMG height=206 src="http://dayoftheunbornchild.com/AnnunciationBannerForYrsFeastIsMoved.jpg"
width=397 border=0></A>
HTML
code for un-linked version of the banner above is as follows:
<A><IMG height=206
src="http://dayoftheunbornchild.com/AnnunciationBannerForYrsFeastIsMoved.jpg"
width=397 border=0></A>
Text
Used in Graphic (can be used with translation tools):
NEW
YEAR’S DAY IN SPRING!--FEAST OF CHRIST’S CONCEPTION/INCARNATION (Now known as
The Annunciation of the Lord)~Start of the New Year until the 18th Century~Celebrated
on the traditional date of March 25th or days ahead in years with Lent-Easter
conflicts. Note the pregnancy-length interval before Christmas--A symbol of The
Annunciation’s true import--RECLAIM THE DAY!
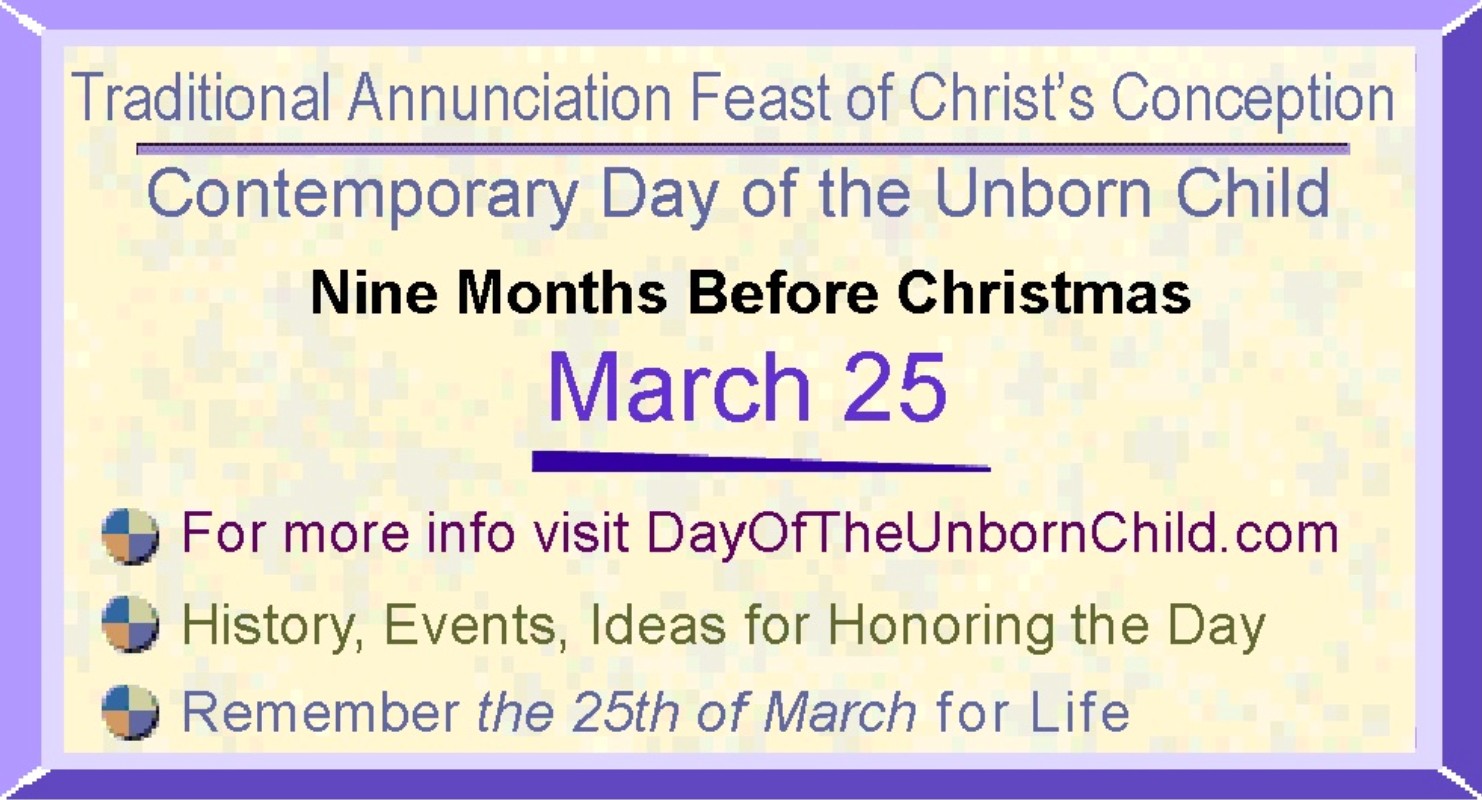
Our Annunciation/DayOfTheUnbornChild.com Banner
Invites a Visit to Our Website for More Info on March 25th as the Traditional
Feast of Christ's Conception and Contemporary "Day of the Unborn
Child" Observed 9 Months Before Christmas -- and a Reminder to Remember
the 25th of March for Life
[NOTE: In addition to the web applications
described below, you can also download an MS Word template to print the graphic
as envelope seals/stickers or top-fold invitation-size
note-cards/postcards. For stickers/seals
right-click HERE
to save the file and print on Avery 48863 (or 5163-template) labels (available
at Wal-Mart and office supply stores), or try full sheet labels, or plain paper
with a sticker machine. For note-cards
right-click HERE
and save and print, then cut page in half between the images and fold each half
down; the same note-card file can print postcards--just print, then
flip/turn to print again in the blank half of sheet, and cut in quarters. For small signs (standard 8 1/2 x 11
in. size for bulletin boards, fliers, etc.) right-click HERE and save
and print (landscape orientation) on white paper or cardstock--click HERE
for instructions to make a stand-up tent-style sign for prayer card
displays and literature/refreshment tables.]
HTML Code: To insert the banner
above linked or un-linked directly with HTML, select/highlight the entire
code-string in the appropriate text box below by clicking/dragging your mouse,
(or use Shift and the cursor arrows) -- then right click and choose COPY. Then to insert, right click and PASTE. (See instructions
below for details).
HTML
code for linked version of the banner above is as follows:
<A
href="http://dayoftheunbornchild.com/" target="new"><IMG
height=206
src="http://dayoftheunbornchild.com/AnnunciationDayOfTheUnbornChildWebsiteBanner.jpg"
width=397 border=0></A>
HTML
code for un-linked version of the banner above is as follows:
<A><IMG height=206
src="http://dayoftheunbornchild.com/AnnunciationDayOfTheUnbornChildWebsiteBanner.jpg"
width=397 border=0></A>
Text
Used in Graphic (can be used with translation tools):
Traditional
Annunciation Feast of Christ's Conception
Contemporary
Day of the Unborn Child
9
Months Before Christmas
MARCH
25
*
For more info visit DayOfTheUnbornChild.com
*
History, Events, Ideas for Honoring the Day
*
Remember the 25th of March for Life
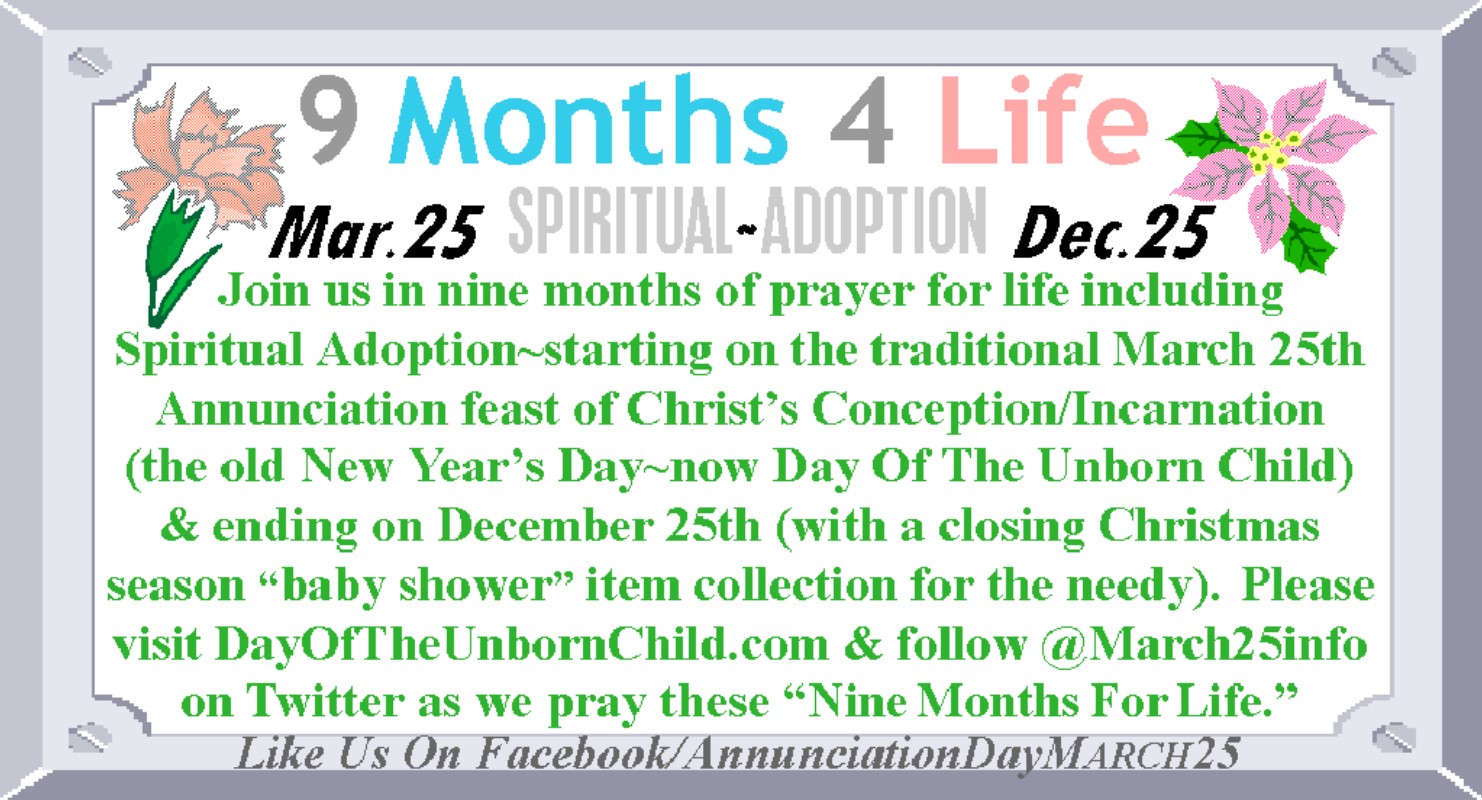
The
9 Months 4 Life Spiritual Adoption Banner Promotes Annunciation Day as
the Start of a Nine Month Period of Spiritual Adoption for the Unborn, Calling
Us to Pro-Life Prayer Between the Feast Dates of March 25th and December 25th
-- The Text Notes the Annunciation's Former Status as New Year's Day, Its
Recent Designation as Day of the Unborn Child, and Its Relationship to Christmas. For more information see the "9
Months 4 Life" page, or scroll down for details on using the banner.
[NOTE: In addition to the web applications
described below, you can also download an MS Word template to print the graphic
as envelope seals/stickers or top-fold invitation-size
note-cards/postcards. For stickers/seals
right-click HERE
to save the file and print on Avery 48863 (or 5163-template) labels (available
at Wal-Mart and office supply stores), or try full sheet labels, or plain paper
with a sticker machine. For note-cards
right-click HERE
and save and print, then cut page in half between the images and fold each half
down; the same note-card file can print postcards--just print, then
flip/turn to print again in the blank half of sheet, and cut in quarters. For small signs (standard 8 1/2 x 11
in. size for bulletin boards, fliers, etc.) right-click HERE and
save and print (landscape orientation) on white paper or cardstock--click HERE
for instructions to make a stand-up tent-style sign for prayer card
displays and literature/refreshment tables.]
HTML Code: To insert the banner
above linked or un-linked directly with HTML, select/highlight the entire
code-string in the appropriate text box below by clicking/dragging your mouse,
(or use Shift and the cursor arrows) -- then right click and choose COPY. Then to insert, right click and PASTE. (See instructions
below for details).
HTML
code for linked version of the banner above is as follows:
<A
href="http://dayoftheunbornchild.com/"
target="new"><IMG height=206
src="http://dayoftheunbornchild.com/9months4lifeAnnunciationBanner.jpg"
width=397 border=0></A>
HTML
code for un-linked version of the banner above is as follows:
<A><IMG height=206
src="http://dayoftheunbornchild.com/9months4lifeAnnunciationBanner.jpg"
width=397 border=0></A>
Text
Used in Graphic (can be used with translation tools):
9
MONTHS FOR LIFE
March
25 SPIRITUAL~ADOPTION December 25
Join
us in nine months of prayer for life including Spiritual Adoption--starting on
the traditional March 25th Annunciation feast of Christ’s
Conception/Incarnation (the Old New Year’s Day--now Day Of The Unborn Child)
and ending on December 25th (with a closing Christmas season “baby shower” item
drive for the needy). Please visit
DayOfTheUnbornChild.com and follow @March25info on Twitter as we pray these
“Nine Months For Life.”
Like
Us On Facebook/AnnunciationDayMarch25
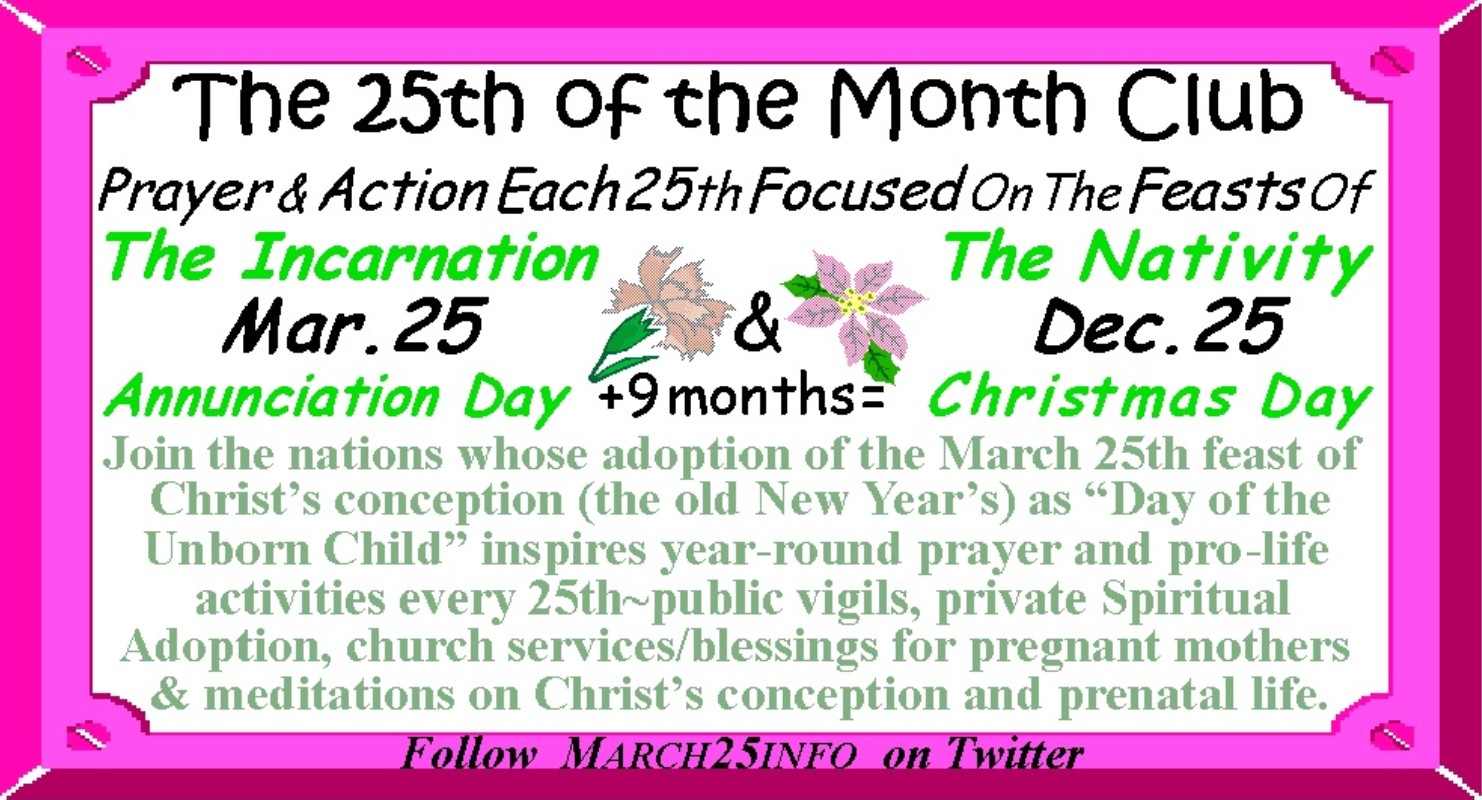
The 25th of the Month
Club Banner Promotes Reflection on the First Part of Christ's Hidden Life
from Conception to Birth & Encourages Pro-Life Activities Each 25th of the
Month--With Special Emphasis on March 25 and December 25. The Annunciation Feast is an Ideal Occasion
to Introduce this Easy Once-A-Month Program of Prayer and Action. Click
here for more information or scroll down for instructions on using the
banner.
[NOTE: In addition to the web applications
described below, you can also download an MS Word template to print the graphic
as envelope seals/stickers or top-fold invitation-size
note-cards/postcards. For stickers/seals
right-click HERE
to save the file and print on Avery 48863 (or 5163-template) labels (available
at Wal-Mart and office supply stores), or try full sheet labels, or plain paper
with a sticker machine. For note-cards
right-click HERE
and save and print, then cut page in half between the images and fold each half
down; the same note-card file can print postcards--just print, then
flip/turn to print again in the blank half of sheet, and cut in quarters. For small signs (standard 8 1/2 x 11
in. size for bulletin boards, fliers, etc.) right-click HERE and save
and print (landscape orientation) on white paper or cardstock--click HERE
for instructions to make a stand-up tent-style sign for prayer card
displays and literature/refreshment tables.]
HTML Code: To insert the banner above linked or
un-linked directly with HTML, select/highlight the entire code-string in the
appropriate text box below by clicking/dragging your mouse, (or use Shift and
the cursor arrows) -- then right click and choose COPY. Then to insert, right click and PASTE. (See instructions
below for details).
HTML
code for linked version of the banner above is as follows:
<A
href="http://dayoftheunbornchild.com/"
target="new"><IMG height=206
src="http://dayoftheunbornchild.com/25thOfTheMonthClub_banner.jpg"
width=397 border=0></A>
HTML
code for un-linked version of the banner above is as follows:
<A><IMG height=206
src="http://dayoftheunbornchild.com/25thOfTheMonthClub_banner.jpg"
width=397 border=0></A>
Text
Used in Graphic (can be used with translation tools):
THE
25TH OF THE MONTH CLUB
Prayer
and Action Each 25th Focused on the Feasts of
The
Incarnation
The Nativity
Mar.25 & Dec.25
Annunciation
Day +9Months= Christmas Day
Join
the nations whose adoption of the March 25th feast of Christ’s conception (the
old New Year’s) as "Day of the Unborn Child" inspires year-round prayer
and pro-life activities every 25th--public vigils, private Spiritual Adoption,
church services/blessings for pregnant mothers and meditations on Christ’s
conception and prenatal life. Follow
MARCH25INFO on Twitter!
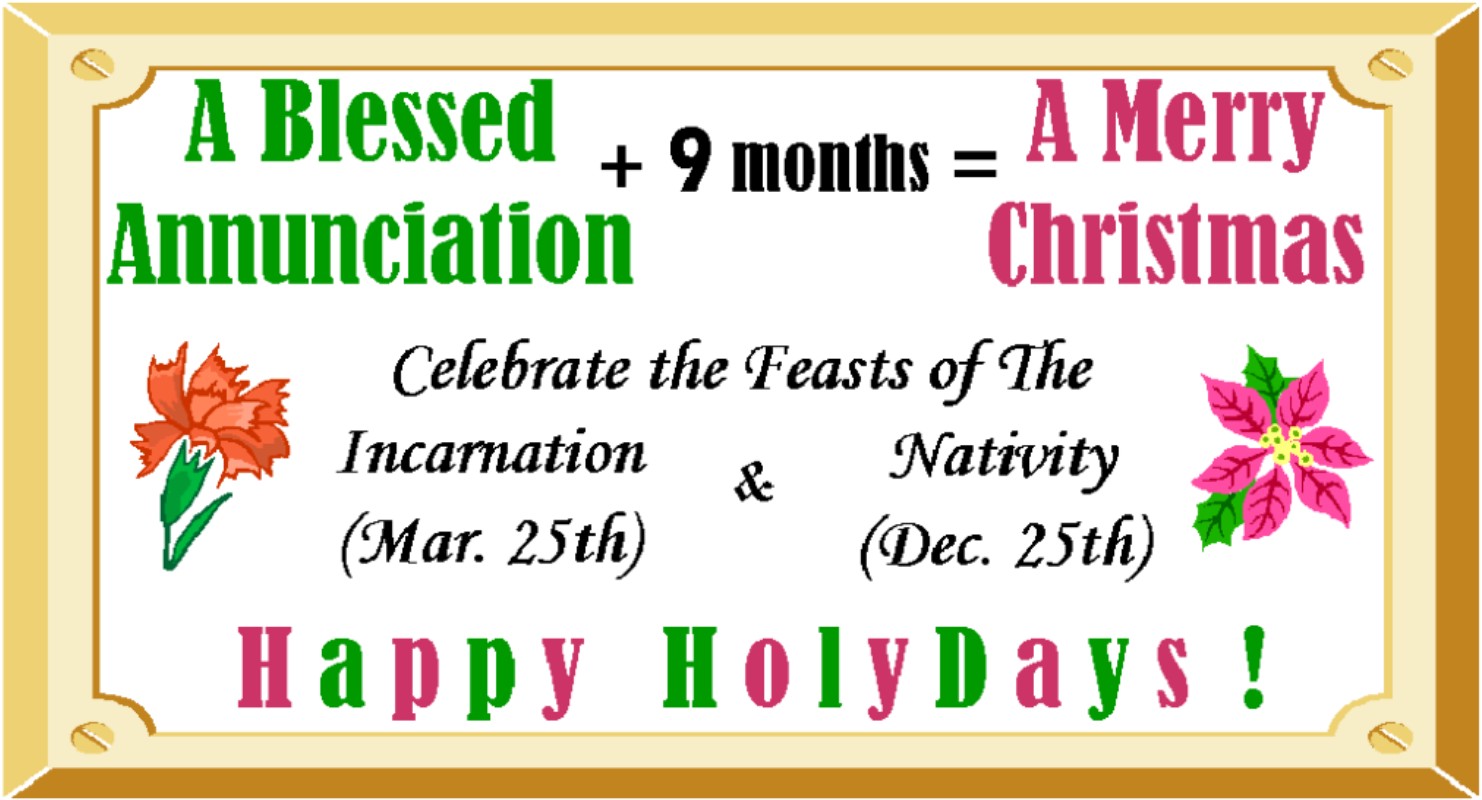
Our Dual-Season Banner Links
the Annunciation to Christmas as "Happy HolyDays" (with an added
reminder of the original meaning of the familiar but not-so-secular greeting)
[NOTE: In addition to the web applications
described below, you can also download an MS Word template to print the graphic
as envelope seals/stickers or top-fold invitation-size note-cards/postcards. For stickers/seals right-click HERE to save
the file and print on Avery 48863 (or 5163-template) labels (available at
Wal-Mart and office supply stores), or try full sheet labels, or plain paper
with a sticker machine. For note-cards
right-click HERE
and save and print, then cut page in half between the images and fold each half
down; the same note-card file can print postcards--just print, then
flip/turn to print again in the blank half of sheet, and cut in quarters. For small signs (standard 8 1/2 x 11
in. size for bulletin boards, fliers, etc.) right-click HERE and
save and print (landscape orientation) on white paper or cardstock--click HERE
for instructions to make a stand-up tent-style sign for prayer card
displays and literature/refreshment tables.]
HTML Code: To insert the banner above linked or
un-linked directly with HTML, select/highlight the entire code-string in the
appropriate text box below by clicking/dragging your mouse, (or use Shift and
the cursor arrows) -- then right click and choose COPY. Then to insert, right click and PASTE. (See instructions
below for details).
HTML
code for linked version of the banner above is as follows:
<A
href="http://dayoftheunbornchild.com/"
target="new"><IMG height=206
src="http://dayoftheunbornchild.com/ChristmasDayOfUnbornWebBanner1.jpg"
width=397 border=0></A>
HTML
code for un-linked version of the banner above is as follows:
<A><IMG height=206
src="http://dayoftheunbornchild.com/ChristmasDayOfUnbornWebBanner1.jpg"
width=397 border=0></A>
Text
Used in Graphic (can be used with translation tools):
A
Blessed
A Merry
Annunciation + 9 Months = Christmas
Celebrate the Feasts of The
Incarnation & Nativity
(Mar.
25th)
(Dec. 25th)
Happy Holy Days!
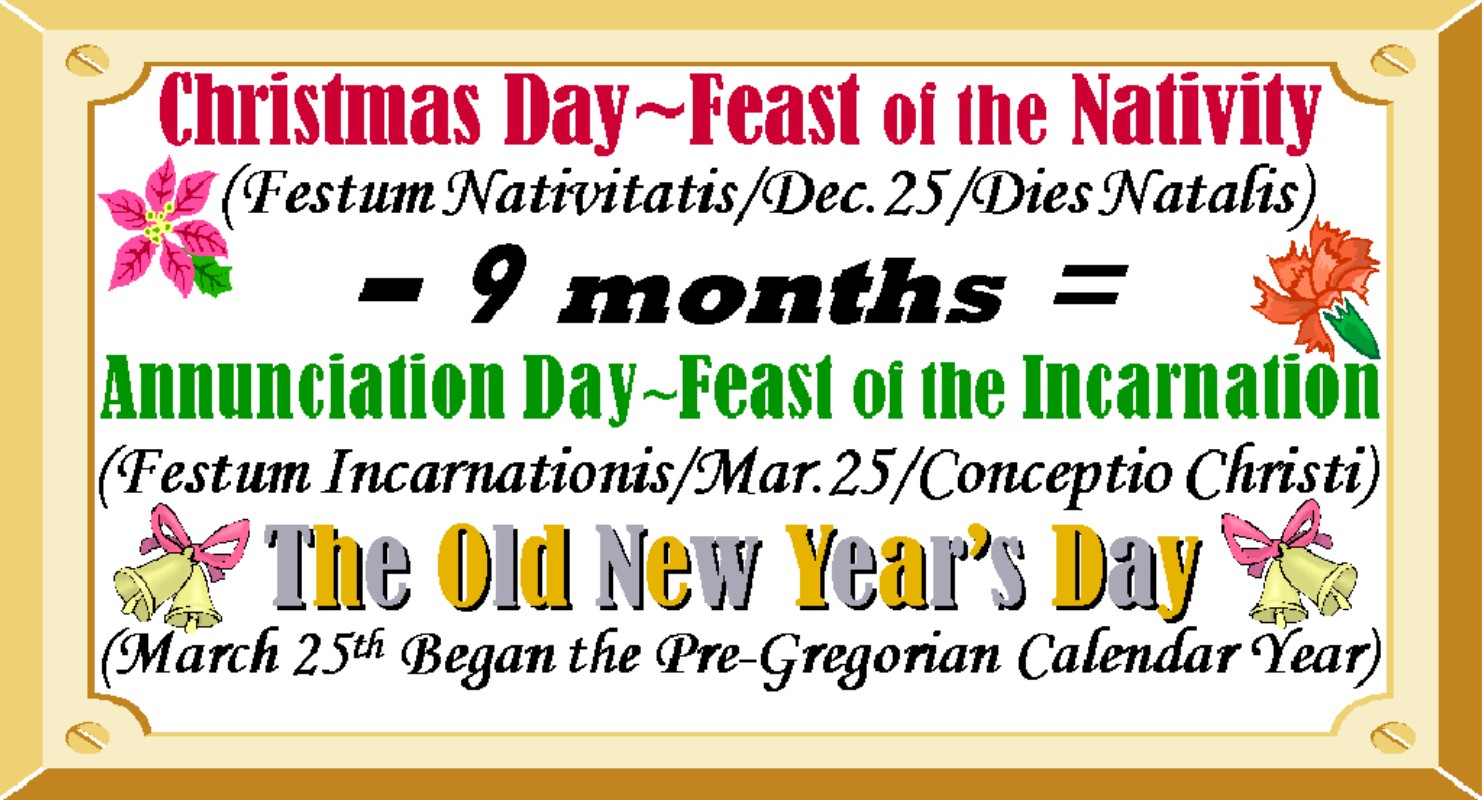
Our Multi-Holiday Banner
Ties the Annunciation to both Christmas and New Year's Day
[NOTE: In addition to the web applications
described below, you can also download an MS Word template to print the graphic
as envelope seals/stickers or top-fold invitation-size note-cards/postcards. For stickers/seals right-click HERE to
save the file and print on Avery 48863 (or 5163-template) labels (available at
Wal-Mart and office supply stores), or try full sheet labels, or plain paper
with a sticker machine. For note-cards
right-click HERE
and save and print, then cut page in half between the images and fold each half
down; the same note-card file can print postcards--just print, then
flip/turn to print again in the blank half of sheet, and cut in quarters. For small signs (standard 8 1/2 x 11
in. size for bulletin boards, fliers, etc.) right-click HERE and
save and print (landscape orientation) on white paper or cardstock--click HERE
for instructions to make a stand-up tent-style sign for prayer card
displays and literature/refreshment tables.]
HTML Code: To insert the banner
above linked or un-linked directly with HTML, select/highlight the entire
code-string in the appropriate text box below by clicking/dragging your mouse,
(or use Shift and the cursor arrows) -- then right click and choose COPY. Then to insert, right click and PASTE. (See instructions
below for details).
HTML
code for linked version of the banner above is as follows:
<A
href="http://dayoftheunbornchild.com/"
target="new"><IMG height=206
src="http://dayoftheunbornchild.com/ChristmasNewYearAnnunciationBanner.jpg"
width=397 border=0></A>
HTML
code for un-linked version of the banner above is as follows:
<A><IMG height=206
src="http://dayoftheunbornchild.com/ChristmasNewYearAnnunciationBanner.jpg"
width=397 border=0></A>
Text
Used in Graphic (can be used with translation tools):
Christmas
Day—Feast of the Nativity
(Festum
Nativitatis/December 25/Dies Natalis)
- 9 months =
Annunciation
Day—Feast of the Incarnation
(Festum
Incarnationis/March 25/Conceptio Christi)
The
Old New Year’s Day
(March
25th Began the Pre-Gregorian Calendar Year)
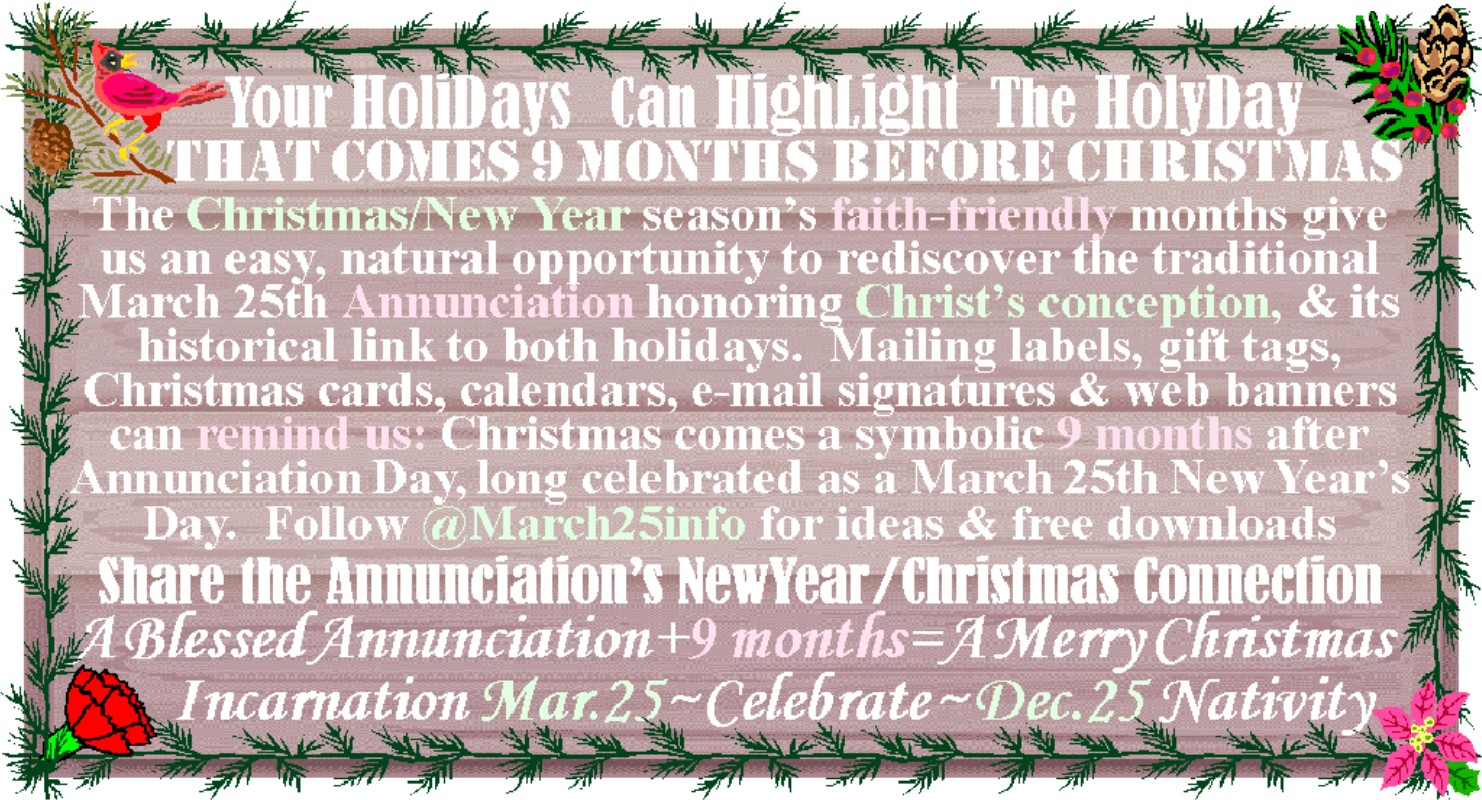
Our Share The
Annunciation's New Year/Christmas Connection Banner with its rustic winter
theme invites others to highlight the Annunciation's relationship to both
holidays, ideal for seasonal mailings and social networking from November
through the first month of the year
[NOTE:
In addition to the web applications described below, you can also download
an MS Word template to print the graphic as envelope seals/stickers or top-fold
invitation-size note-cards/postcards.
For stickers/seals right-click HERE
to save the file and print on Avery 48863 (or 5163-template) labels (available
at Wal-Mart and office supply stores), or try full sheet labels, or plain paper
with a sticker machine. For note-cards
right-click HERE
and save and print, then cut page in half between the images and fold each half
down; the same note-card file can print postcards--just print, then
flip/turn to print again in the blank half of sheet, and cut in quarters. For small signs (standard 8 1/2 x 11
in. size for bulletin boards, fliers, etc.) right-click HERE
and save and print (landscape orientation) on white paper or cardstock--click HERE
for instructions to make a stand-up tent-style sign for prayer card
displays and literature/refreshment tables.]
HTML Code: To insert the banner above linked or
un-linked directly with HTML, select/highlight the entire code-string in the
appropriate text box below by clicking/dragging your mouse, (or use Shift and
the cursor arrows) -- then right click and choose COPY. Then to insert, right click and PASTE. (See instructions
below for details).
HTML
code for linked version of the banner above is as follows:
<A href="http://dayoftheunbornchild.com/"
target="new"><IMG height=206
src="http://dayoftheunbornchild.com/ShareTheAnnunciationsChristmasNewYearConnection_Banner.jpg"
width=397 border=0></A>
HTML
code for un-linked version of the banner above is as follows:
<A><IMG height=206
src="http://dayoftheunbornchild.com/ShareTheAnnunciationsChristmasNewYearConnection_Banner.jpg"
width=397 border=0></A>
Text
Used in Graphic (can be used with translation tools):
"Your
HoliDays Can HighLight The Holy Day--That comes 9 months before Christmas:
The
Christmas / New Year season’s faith-friendly months give us an easy, natural
opportunity to rediscover the traditional March 25th Annunciation honoring
Christ’s conception, and its historical link to both holidays. Mailing labels, gift tags, Christmas cards,
calendars, e-mail signatures and web banners can remind us: Christmas comes a
symbolic 9 months after Annunciation Day, long celebrated as a March 25th New
Year’s Day. Follow @March25info for
ideas and free downloads.
Share
the Annunciation’s New-Year/Christmas Connection
A
Blessed Annunciation+9 months=A Merry Christmas
Incarnation
Mar.25 ~ Celebrate ~ Dec.25 Nativity
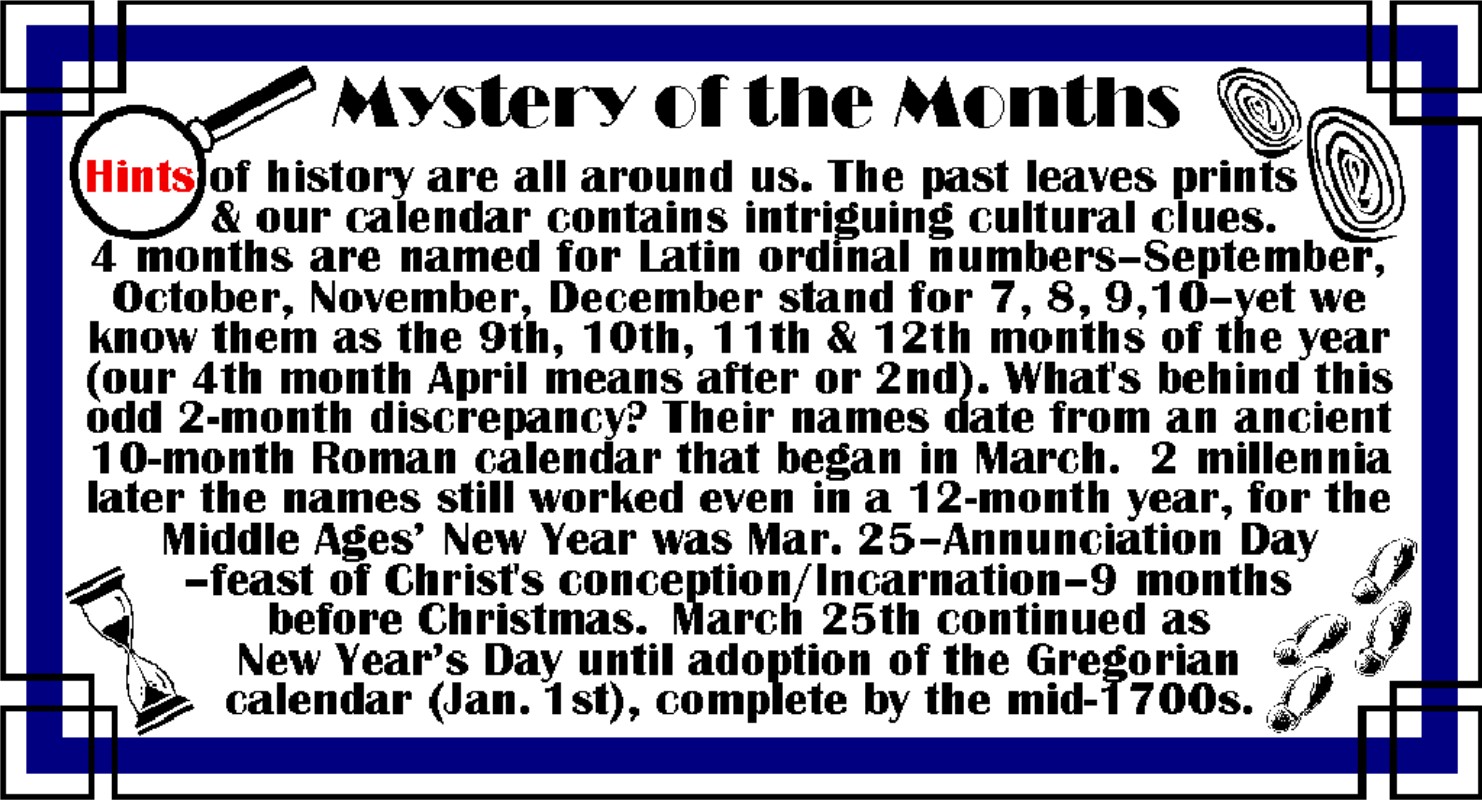
Our Mystery of the Months
Banner puts Annunciation Day in the Context of Calendar History, and can be shared
any time anywhere especially with those interested in word origins or
trivia. It's particularly relevant in
January when we begin a new calendar year, and from September through December
as it explains why the numerical meaning of those months is two months off from
their calendar order.
[NOTE: In addition to the web applications
described below, you can also download an MS Word template to print the graphic
as envelope seals/stickers or top-fold invitation-size
note-cards/postcards. For stickers/seals
right-click HERE
to save the file and print on Avery 48863 (or 5163-template) labels (available
at Wal-Mart and office supply stores), or try full sheet labels, or plain paper
with a sticker machine. For note-cards
right-click HERE
and save and print, then cut page in half between the images and fold each half
down; the same note-card file can print postcards--just print, then
flip/turn to print again in the blank half of sheet, and cut in quarters. For small signs (standard 8 1/2 x 11
in. size for bulletin boards, fliers, etc.) right-click HERE
and save and print (landscape orientation) on white paper or cardstock--click HERE
for instructions to make a stand-up tent-style sign for prayer card
displays and literature/refreshment tables.]
HTML Code: To insert the banner above linked or
un-linked directly with HTML, select/highlight the entire code-string in the
appropriate text box below by clicking/dragging your mouse, (or use Shift and
the cursor arrows) -- then right click and choose COPY. Then to insert, right click and PASTE. (See instructions
below for details).
HTML
code for linked version of the banner above is as follows:
<A href="http://dayoftheunbornchild.com/"
target="new"><IMG height=206
src="http://dayoftheunbornchild.com/MysteryOfTheMonths_March25NewYear_Banner.jpg"
width=397 border=0></A>
HTML
code for un-linked version of the banner above is as follows:
<A><IMG height=206 src="http://dayoftheunbornchild.com/MysteryOfTheMonths_March25NewYear_Banner.jpg"
width=397 border=0></A>
Text
Used in Graphic (can be used with translation tools):
"Mystery
Of The Months: Hints of history are all
around us. The past leaves prints and our calendar contains intriguing cultural
clues. 4 months are named for Latin
ordinal numbers--September, October, November, December stand for 7, 8,
9,10--yet we know them as the 9th, 10th, 11th & 12th months of the year
(our 4th month April means after or 2nd). What's behind this odd 2-month
discrepancy? Their names date from an ancient 10-month Roman calendar that
began in March. 2 millennia later the
names still worked even in a 12-month year, for the Middle Ages’ New Year was
Mar. 25--Annunciation Day--feast of Christ's conception/Incarnation--9 months
before Christmas. March 25th continued as New Year’s Day until adoption of the
Gregorian calendar (Jan. 1st), complete by the mid-1700s."
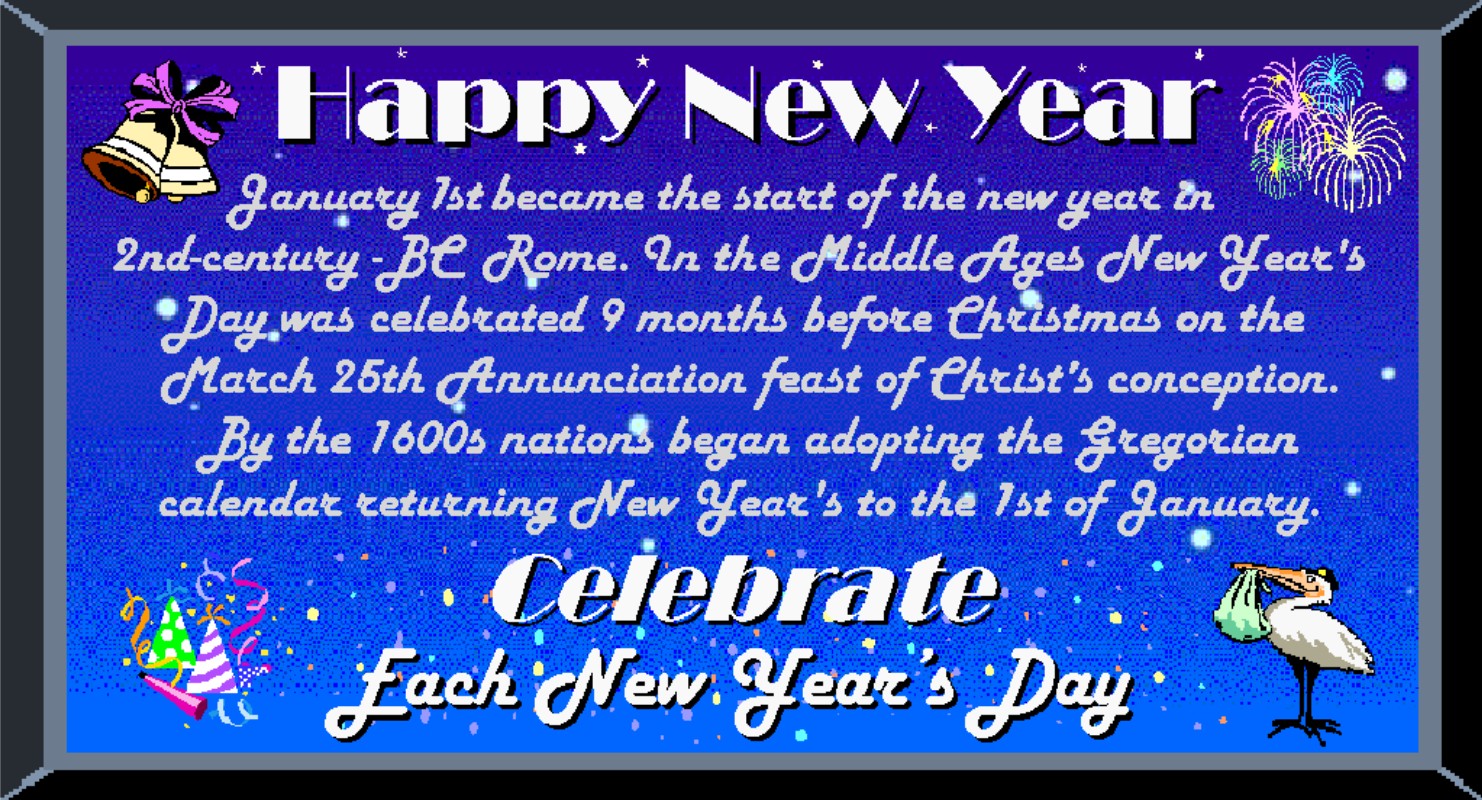
Our Happy New Year Banner Combines Festive Symbols with a Brief
History of New Year's Day Including the Annunciation's Former Position of
Prominence Honored for Centuries as the First of the Year
[NOTE: In addition to the web applications
described below, you can also download an MS Word template to print the graphic
as envelope seals/stickers or top-fold invitation-size note-cards/postcards. For stickers/seals right-click HERE
to save the file and print on Avery 48863 (or 5163-template) labels (available
at Wal-Mart and office supply stores), or try full sheet labels, or plain paper
with a sticker machine. For note-cards
right-click HERE
and save and print, then cut page in half between the images and fold each half
down; the same note-card file can print postcards--just print, then
flip/turn to print again in the blank half of sheet, and cut in quarters. For small signs (standard 8 1/2 x 11
in. size for bulletin boards, fliers, etc.) right-click HERE
and save and print (landscape orientation) on white paper or cardstock--click HERE
for instructions to make a stand-up tent-style sign for prayer card
displays and literature/refreshment tables.]
HTML Code: To insert the banner
above linked or un-linked directly with HTML, select/highlight the entire
code-string in the appropriate text box below by clicking/dragging your mouse,
(or use Shift and the cursor arrows) -- then right click and choose COPY. Then to insert, right click and PASTE. (See instructions
below for details).
HTML
code for linked version of the banner above is as follows:
<A
href="http://dayoftheunbornchild.com/"
target="new"><IMG height=206 src="http://dayoftheunbornchild.com/HappyNewYearBannerWithAnnunciationConnectionStarsConfetti.jpg"
width=397 border=0></A>
HTML
code for un-linked version of the banner above is as follows:
<A><IMG height=206 src="http://dayoftheunbornchild.com/HappyNewYearBannerWithAnnunciationConnectionStarsConfetti.jpg"
width=397 border=0></A>
Text
Used in Graphic (can be used with translation tools):
HAPPY
NEW YEAR
January
1st became the start of the new year in 2nd-century-BC Rome. In the Middle Ages
New Year's Day was celebrated 9 months before Christmas on the March 25th
Annunciation feast of Christ's conception.
By the 1600s nations began adopting the Gregorian calendar returning New
Year's to the 1st of January.
CELEBRATE
Each
New Year's Day
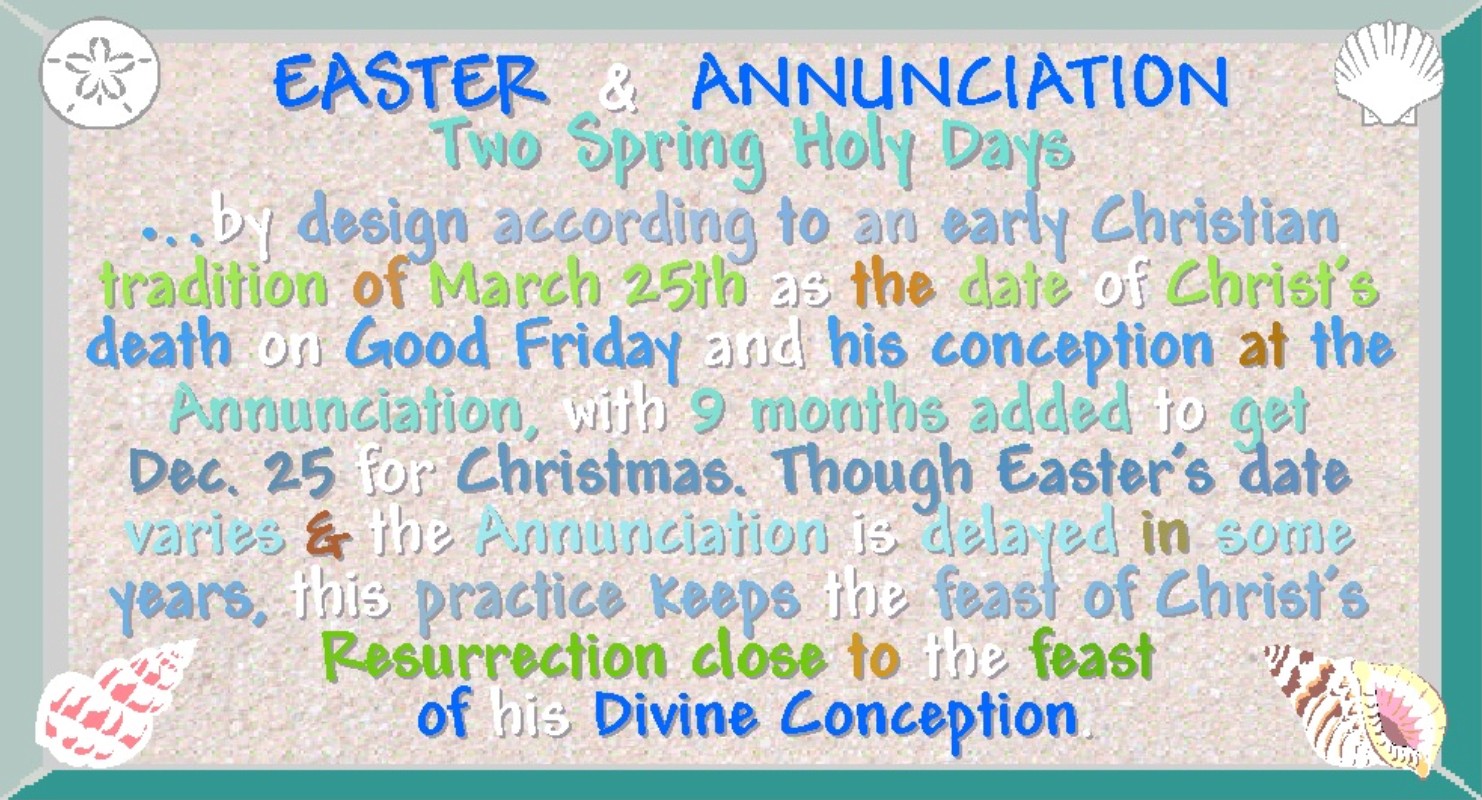
Our Lent/Easter Season
Banner in Soft Sea-Glass Colors Highlights the March 25th Calendar Link Between
Annunciation and Good Friday -- Reinforce the Tradition of Sending Easter
Greetings while Raising Awareness of the Annunciation -- Easter is the Fourth
Most Popular Holiday for Greeting Cards Providing a Natural Opportunity and
Timely Reminder to Also Celebrate the Annunciation at this Same Time of Year
[NOTE: In addition to the web applications
described below, you can also download an MS Word template to print the graphic
as envelope seals/stickers or top-fold invitation-size
note-cards/postcards. For stickers/seals
right-click HERE
to save the file and print on Avery 48863 (or 5163-template) labels (available
at Wal-Mart and office supply stores), or try full sheet labels, or plain paper
with a sticker machine. For note-cards
right-click HERE
and save and print, then cut page in half between the images and fold each half
down; the same note-card file can print postcards--just print, then
flip/turn to print again in the blank half of sheet, and cut in quarters. For small signs (standard 8 1/2 x 11
in. size for bulletin boards, fliers, etc.) right-click HERE
and save and print (landscape orientation) on white paper or cardstock--click HERE
for instructions to make a stand-up tent-style sign for prayer card
displays and literature/refreshment tables.]
HTML Code: To insert the banner above linked or
un-linked directly with HTML, select/highlight the entire code-string in the
appropriate text box below by clicking/dragging your mouse, (or use Shift and
the cursor arrows) -- then right click and choose COPY. Then to insert, right click and PASTE. (See instructions
below for details).
HTML
code for linked version of the banner above is as follows:
<A
href="http://dayoftheunbornchild.com/"
target="new"><IMG height=206 src="http://dayoftheunbornchild.com/EastersGoodFridayAnnunciationConnectionBanner.jpg"
width=397 border=0></A>
HTML
code for un-linked version of the banner above is as follows:
<A><IMG height=206 src="http://dayoftheunbornchild.com/EastersGoodFridayAnnunciationConnectionBanner.jpg"
width=397 border=0></A>
Text
Used in Graphic (can be used with translation tools):
EASTER &
ANNUNCIATION
Two
Spring Holy Days
...
by design according to an early Christian tradition of March 25th as the date
of Christ’s death on Good Friday and his conception at the Annunciation, with 9
months added to get Dec. 25 for Christmas. Though Easter’s date varies and the
Annunciation is delayed in some years, this practice keeps the feast of
Christ’s Resurrection close to the feast of His divine conception.
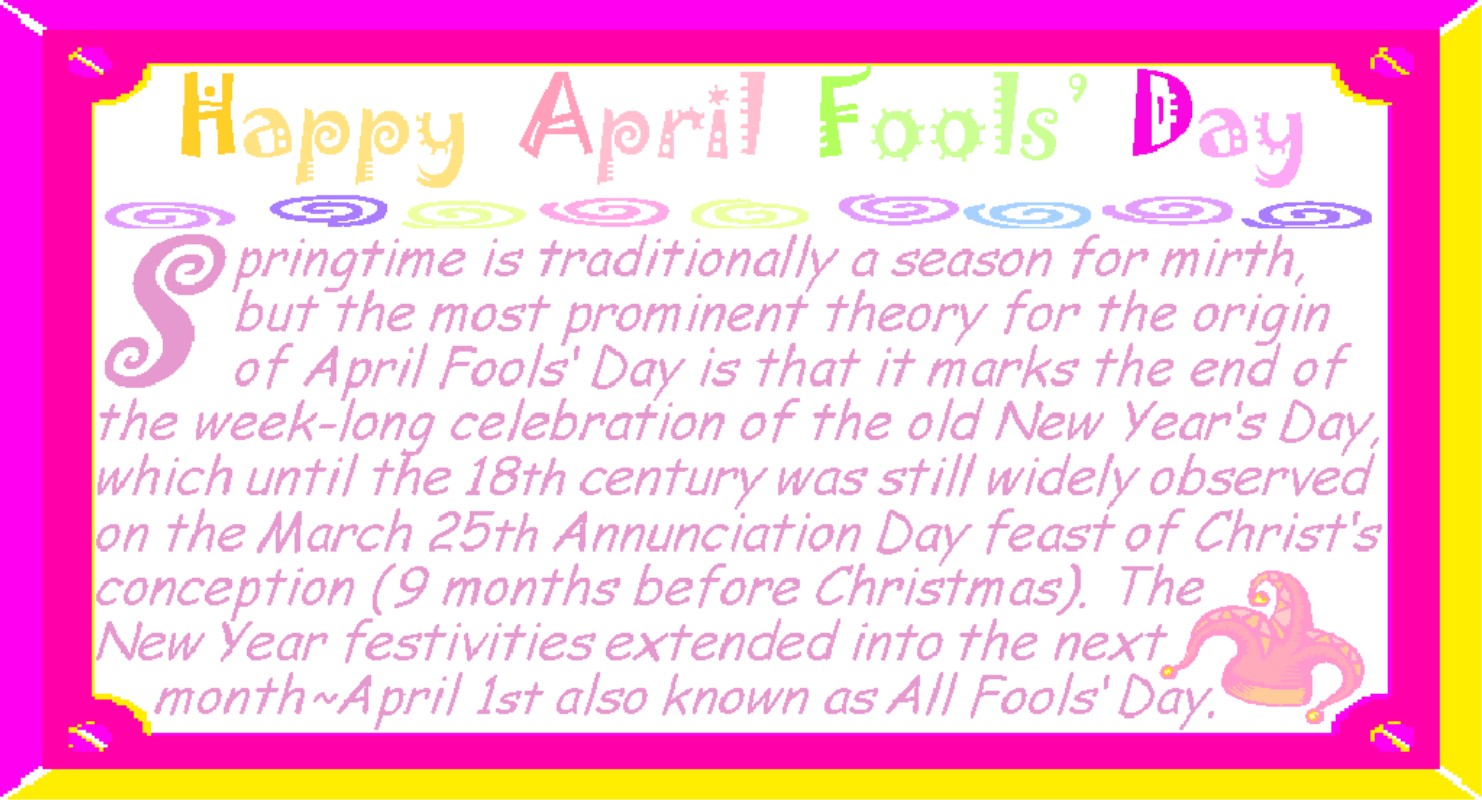
If The Feast Has Just Passed
Our Happy April Fools' Day Banner Gives the Annunciation's Historical
Connection to the April 1st Merriment -- Ideal to Share With Others in a
Secular Context or Who May Be More Open to History than a Specifically
Religious Greeting
[NOTE:
In addition to the web applications described below, you can also
download an MS Word template to print the graphic as envelope seals/stickers or
top-fold invitation-size note-cards/postcards.
For stickers/seals right-click HERE
to save the file and print on Avery 48863 (or 5163-template) labels (available
at Wal-Mart and office supply stores), or try full sheet labels, or plain paper
with a sticker machine. For note-cards
right-click HERE
and save and print, then cut page in half between the images and fold each half
down; the same note-card file can print postcards--just print, then
flip/turn to print again in the blank half of sheet, and cut in quarters. For small signs (standard 8 1/2 x 11
in. size for bulletin boards, fliers, etc.) right-click HERE
and save and print (landscape orientation) on white paper or cardstock--click HERE
for instructions to make a stand-up tent-style sign for prayer card
displays and literature/refreshment tables.]
HTML Code: To insert the banner above linked or
un-linked directly with HTML, select/highlight the entire code-string in the
appropriate text box below by clicking/dragging your mouse, (or use Shift and
the cursor arrows) -- then right click and choose COPY. Then to insert, right click and PASTE. (See instructions
below for details).
HTML
code for linked version of the banner above is as follows:
<A
href="http://dayoftheunbornchild.com/"
target="new"><IMG height=206 src="http://dayoftheunbornchild.com/AprilFoolsDayWithAnnunciationConnectionBanner.jpg"
width=397 border=0></A>
HTML
code for un-linked version of the banner above is as follows:
<A><IMG height=206 src="http://dayoftheunbornchild.com/AprilFoolsDayWithAnnunciationConnectionBanner.jpg"
width=397 border=0></A>
Text
Used in Graphic (can be used with translation tools):
Happy
April Fools' Day: Springtime is
traditionally a season for mirth, but the most prominent theory for the origin
of April Fools' Day is that it marks the end of the week-long celebration of
the old New Year's Day, which until the 18th century was still widely observed
on the March 25th Annunciation Day feast of Christ's conception (9 months
before Christmas). The New Year
festivities extended into the next month–April 1st also known as All Fools'
Day
Another April Fools' Day Banner
Gives a Lighthearted Christian-Directed Message To "Be A Fool For
Christ" Along With A Brief History of the Day and Its Link to the
Annunciation~Ideal for April Fools' Day or the last week of March to give some
slightly belated recognition to the feast day
[NOTE:
In addition to the web applications described below, you can also
download an MS Word template to print the graphic as envelope seals/stickers or
top-fold invitation-size note-cards/postcards.
For stickers/seals right-click HERE
to save the file and print on Avery 48863 (or 5163-template) labels (available
at Wal-Mart and office supply stores), or try full sheet labels, or plain paper
with a sticker machine. For note-cards
right-click HERE
and save and print, then cut page in half between the images and fold each half
down; the same note-card file can print postcards--just print, then
flip/turn to print again in the blank half of sheet, and cut in quarters. For small signs (standard 8 1/2 x 11
in. size for bulletin boards, fliers, etc.) right-click HERE
and save and print (landscape orientation) on white paper or cardstock--click HERE
for instructions to make a stand-up tent-style sign for prayer card
displays and literature/refreshment tables.]
HTML Code: To insert the banner above linked or
un-linked directly with HTML, select/highlight the entire code-string in the
appropriate text box below by clicking/dragging your mouse, (or use Shift and
the cursor arrows) -- then right click and choose COPY. Then to insert, right click and PASTE. (See instructions
below for details).
HTML
code for linked version of the banner above is as follows:
<A
href="http://dayoftheunbornchild.com/"
target="new"><IMG height=206
src="http://dayoftheunbornchild.com/AprilFoolsDayWithAnnunciationConnectionBaFool4ChristBanner.jpg"
width=397 border=0></A>
HTML
code for un-linked version of the banner above is as follows:
<A><IMG height=206 src="http://dayoftheunbornchild.com/AprilFoolsDayWithAnnunciationConnectionBaFool4ChristBanner.jpg"
width=397 border=0></A>
Text
Used in Graphic (can be used with translation tools):
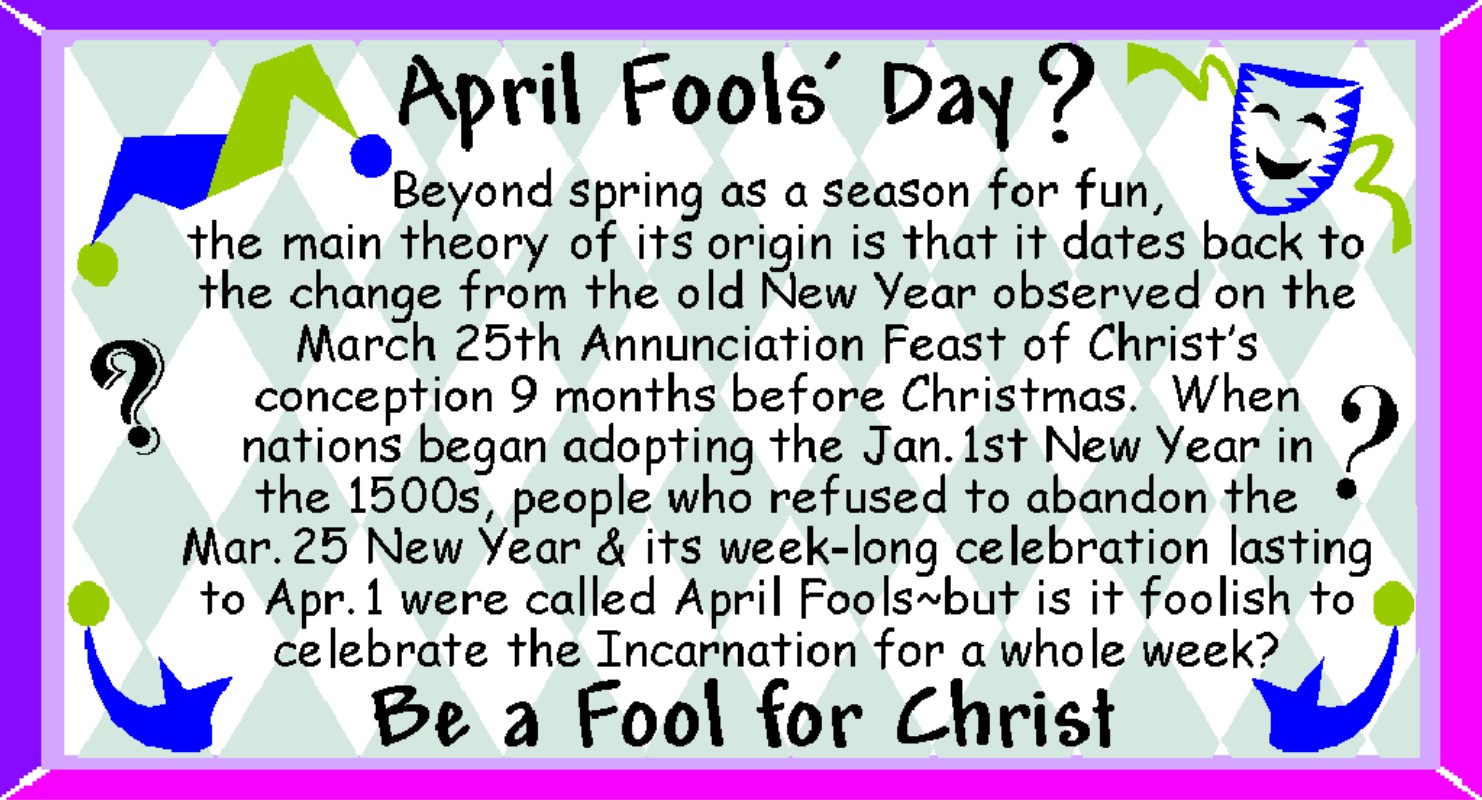
April
Fools' Day: Beyond spring as a season
for fun, the main theory of its origin is that it dates back to the change from
the old New Year observed on the March 25th Annunciation Feast of Christ's
conception 9 months before Christmas.
When nations began adopting the January 1st New Year in the 1500's,
people who refused to abandon the March 25 New Year and its week-long
celebration lasting to April 1 were called April Fools–but is it foolish to
celebrate the Incarnation for a whole week?
Be A Fool For Christ
If the Feast Day has
Recently Passed, the "Calendar Quiz" Banner can be Used Anytime, But
is Particularly Appropriate for April Fools' Day/Tax Season as it Notes the
Annunciation's Connection to Both.
(It's also ideal to share in secular-settings where overtly religious
topics are disallowed or with friends more likely to be interested in the
feast's historical/secular impact)
[NOTE:
In addition to the web applications described below, you can also
download an MS Word template to print the graphic as envelope seals/stickers or
top-fold invitation-size note-cards/postcards.
For stickers/seals right-click HERE
to save the file and print on Avery 48863 (or 5163-template) labels (available
at Wal-Mart and office supply stores), or try full sheet labels, or plain paper
with a sticker machine. For note-cards
right-click HERE
and save and print, then cut page in half between the images and fold each half
down; the same note-card file can print postcards--just print, then
flip/turn to print again in the blank half of sheet, and cut in quarters. For small signs (standard 8 1/2 x 11
in. size for bulletin boards, fliers, etc.) right-click HERE and
save and print (landscape orientation) on white paper or cardstock--click HERE
for instructions to make a stand-up tent-style sign for prayer card
displays and literature/refreshment tables.]
HTML Code: To insert the banner above linked or
un-linked directly with HTML, select/highlight the entire code-string in the
appropriate text box below by clicking/dragging your mouse, (or use Shift and
the cursor arrows) -- then right click and choose COPY. Then to insert, right click and PASTE. (See instructions
below for details).
HTML
code for linked version of the banner above is as follows:
<A
href="http://dayoftheunbornchild.com/"
target="new"><IMG height=206
src="http://dayoftheunbornchild.com/CalendarQuizMar25AnnunciationBanner.jpg"
width=397 border=0></A>
HTML
code for un-linked version of the banner above is as follows:
<A><IMG height=206
src="http://dayoftheunbornchild.com/CalendarQuizMar25AnnunciationBanner.jpg"
width=397 border=0></A>
Text
Used in Graphic (can be used with translation tools):
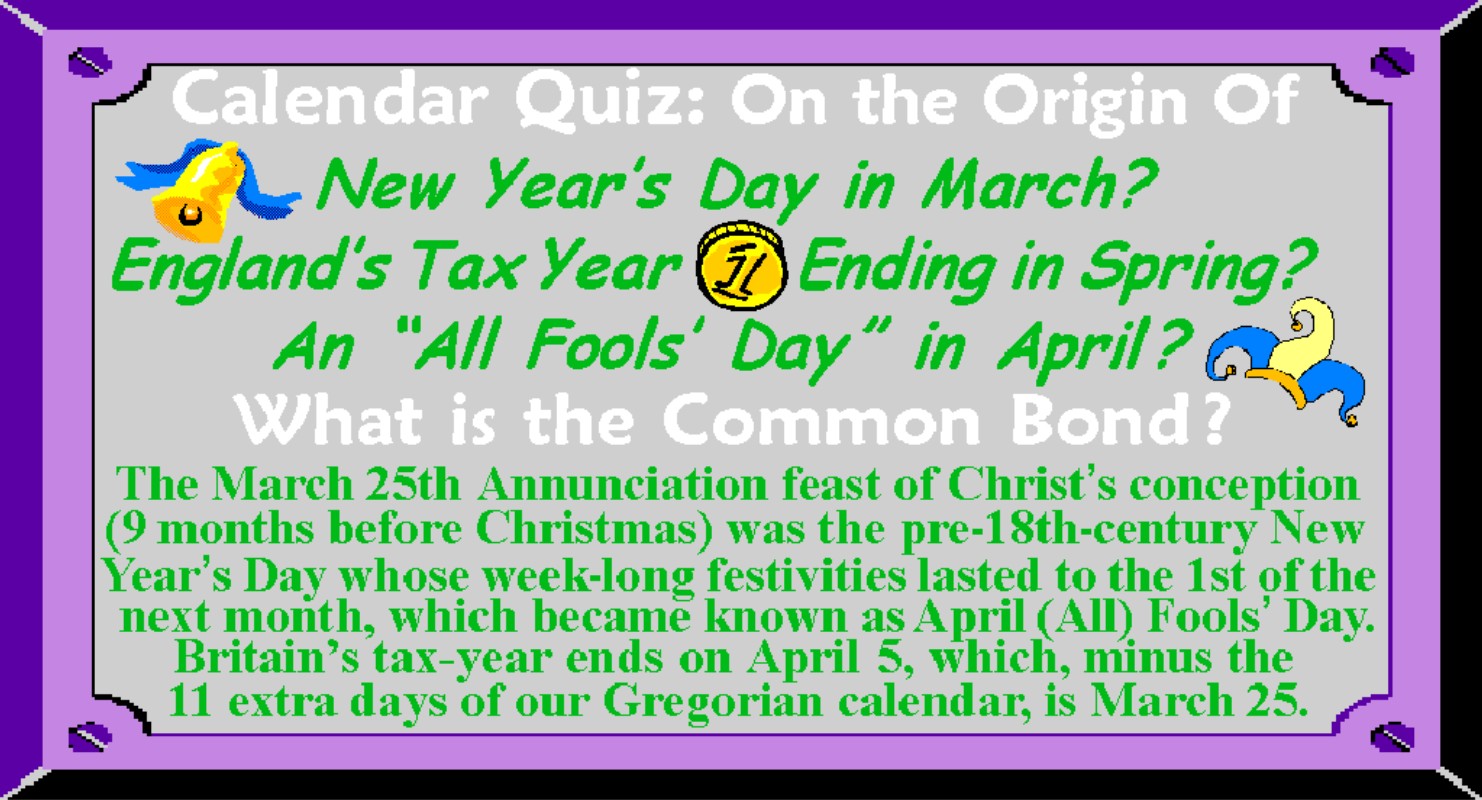
CALENDAR
QUIZ ON THE ORIGIN OF:
New
Year’s Day in March?
England’s
Tax Year Ending in Spring?
An
"All Fools’ Day" in April?
WHAT
IS THE COMMON BOND?
The
March 25th Annunciation feast of Christ’s conception (9 months before
Christmas) was the pre-18th-century New Year’s Day whose week-long festivities
lasted to the 1st of the next month, which became known as April (All) Fools’
Day. Britain’s tax-year ends on April
5, which, minus the 11 extra days of our Gregorian calendar, is March 25.
Our Immaculate Conception Banner Distinguishes this December 8th
Feast of Mary's Conception from the March 25th Annunciation Feast of Christ's
Conception--the two are often confused and the text of this graphic uses the
feast dates themselves as a memory aid.
The banner can be used for the December 8th feast and also 9 months
later for the feast of Mary's birth on September 8th~both dates present
opportunities to clear up misconceptions about these Marian feasts while
presenting information on the feast of Christ's conception and how it too is
celebrated 9 months before the December 25th feast of his birth.
[NOTE:
In addition to the web applications described below, you can also
download an MS Word template to print the graphic as envelope seals/stickers or
top-fold invitation-size note-cards/postcards.
For stickers/seals right-click HERE
to save the file and print on Avery 48863 (or 5163-template) labels (available
at Wal-Mart and office supply stores), or try full sheet labels, or plain paper
with a sticker machine. For note-cards
right-click HERE
and save and print, then cut page in half between the images and fold each half
down; the same note-card file can print postcards--just print, then
flip/turn to print again in the blank half of sheet, and cut in quarters. For small signs (standard 8 1/2 x 11
in. size for bulletin boards, fliers, etc.) right-click HERE
and save and print (landscape orientation) on white paper or cardstock--click HERE
for instructions to make a stand-up tent-style sign for prayer card
displays and literature/refreshment tables.]
HTML Code: To insert the banner above linked or
un-linked directly with HTML, select/highlight the entire code-string in the appropriate
text box below by clicking/dragging your mouse, (or use Shift and the cursor
arrows) -- then right click and choose COPY.
Then to insert, right click and PASTE.
(See instructions below for details).
HTML
code for linked version of the banner above is as follows:
<A
href="http://dayoftheunbornchild.com/"
target="new"><IMG height=206
src="http://dayoftheunbornchild.com/Dec8MarysImmaculateConception9MosB4HerBirthFeastAsWithChristsConceptionAndBirthFeasts.jpg"
width=397 border=0></A>
HTML
code for un-linked version of the banner above is as follows:
<A><IMG height=206
src="http://dayoftheunbornchild.com/Dec8MarysImmaculateConception9MosB4HerBirthFeastAsWithChristsConceptionAndBirthFeasts.jpg"
width=397 border=0></A>
Text
Used in Graphic (can be used with translation tools):
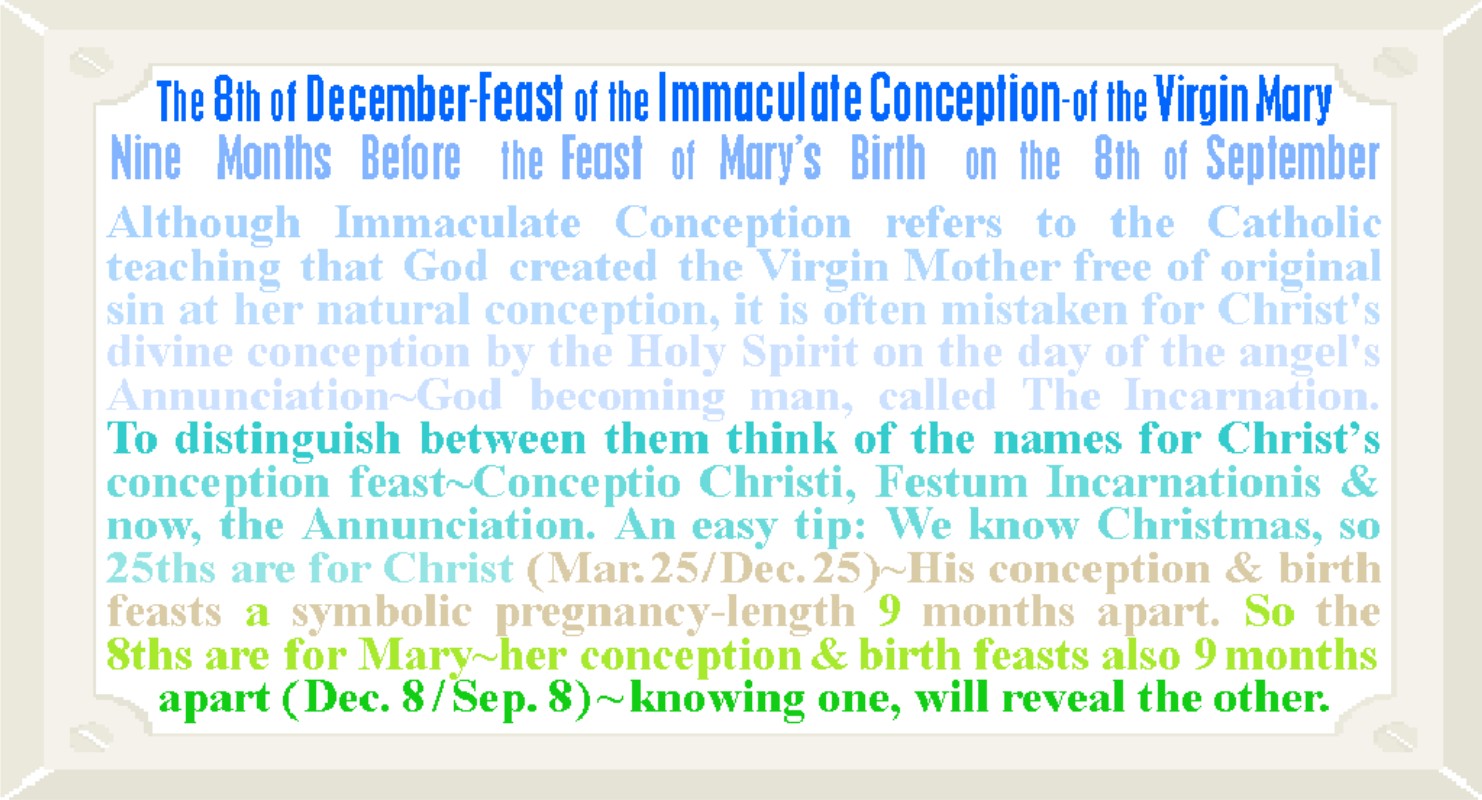
"THE 8TH OF DECEMBER - FEAST OF THE IMMACULATE
CONCEPTION - OF THE VIRGIN MARY--Nine Months Before the Feast of Mary’s Birth
on the 8th of September: Although
Immaculate Conception refers to the Catholic teaching that God created the
Virgin Mother free of original sin at her natural conception, it is often
mistaken for Christ's divine conception by the Holy Spirit on the day of the
angel's Annunciation--God becoming man, called The Incarnation. To distinguish between them think of the
names for Christ’s conception feast--Conceptio Christi, Festum Incarnationis
and now, the Annunciation. An easy tip:
We know Christmas, so 25ths are for Christ (Mar. 25 / Dec. 25)--His conception
& birth feasts a symbolic pregnancy-length 9 months apart. So the 8ths are
for Mary--her conception & birth feasts also 9 months apart (Dec. 8 / Sep.
8)--knowing one, will reveal the other."
Our Prayer To Christ
Unborn Banner Highlights Christ's Conception as the Moment of Incarnation
and Invites Meditation on the Nine Months of His Hidden Life Before Birth ~
Includes a Notation on the Significance of the Annunciation Feast Date
[NOTE:
In addition to the web applications described below, you can also
download an MS Word template to print the graphic as envelope seals/stickers or
top-fold invitation-size note-cards/postcards.
For stickers/seals right-click HERE
to save the file and print on Avery 48863 (or 5163-template) labels (available
at Wal-Mart and office supply stores), or try full sheet labels, or plain paper
with a sticker machine. For note-cards
right-click HERE
and save and print, then cut page in half between the images and fold each half
down; the same note-card file can print postcards--just print, then
flip/turn to print again in the blank half of sheet, and cut in quarters. For small signs (standard 8 1/2 x 11
in. size for bulletin boards, fliers, etc.) right-click HERE
and save and print (landscape orientation) on white paper or cardstock--click HERE
for instructions to make a stand-up tent-style sign for prayer card
displays and literature/refreshment tables.]
HTML Code: To insert the banner above linked or
un-linked directly with HTML, select/highlight the entire code-string in the
appropriate text box below by clicking/dragging your mouse, (or use Shift and
the cursor arrows) -- then right click and choose COPY. Then to insert, right click and PASTE. (See instructions
below for details).
HTML
code for linked version of the banner above is as follows:
<A
href="http://dayoftheunbornchild.com/"
target="new"><IMG height=206
src="http://dayoftheunbornchild.com/PrayerToChristUnbornMar25AnnunciationBanner.jpg"
width=397 border=0></A>
HTML
code for un-linked version of the banner above is as follows:
<A><IMG height=206
src="http://dayoftheunbornchild.com/PrayerToChristUnbornMar25AnnunciationBanner.jpg"
width=397 border=0></A>
Text
Used in Graphic (can be used with translation tools):
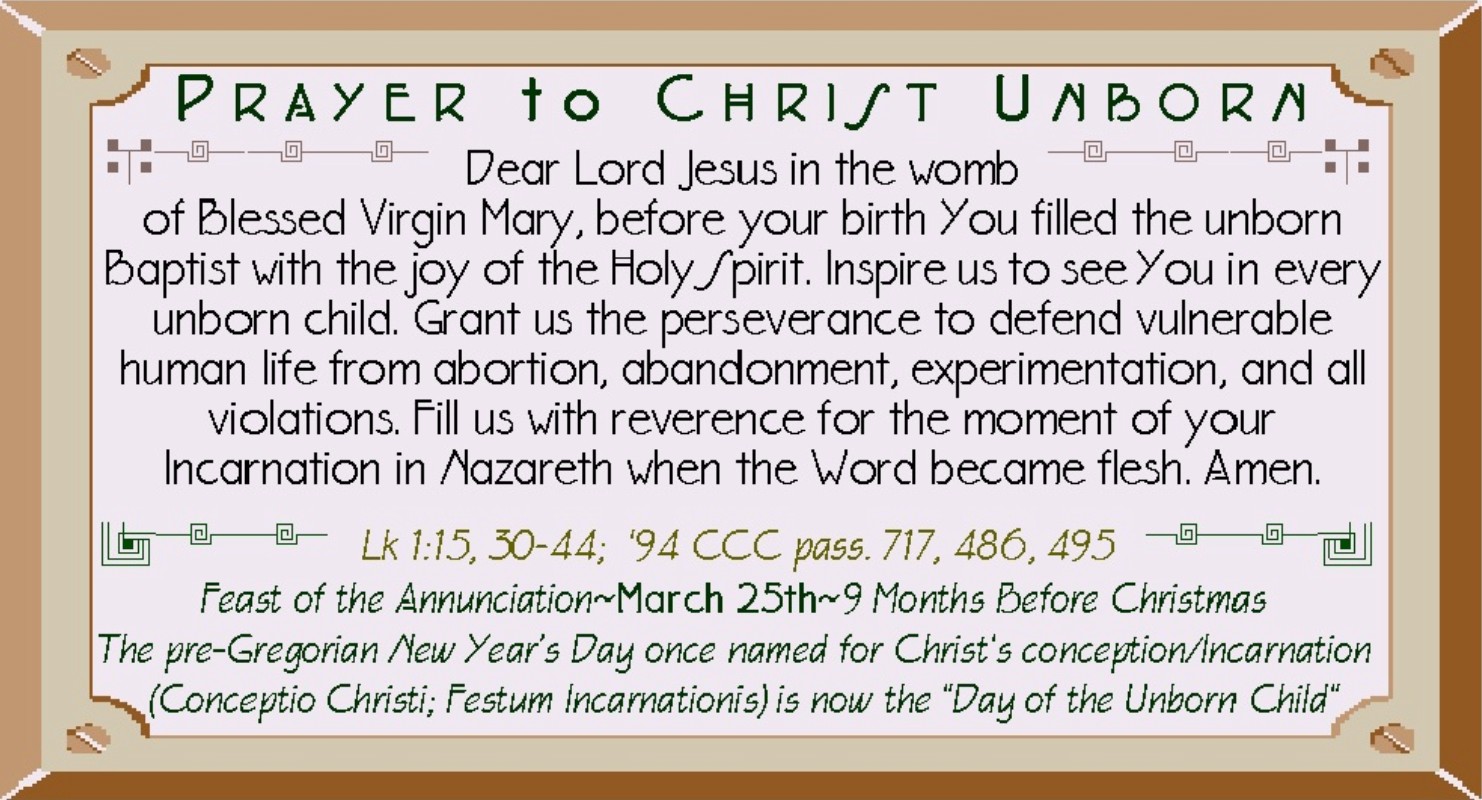
PRAYER
TO CHRIST UNBORN
Dear
Lord Jesus in the womb of Blessed Virgin Mary, before your birth You filled the
unborn Baptist with the joy of the Holy Spirit. Inspire us to see You in every
unborn child. Grant us the perseverance to defend vulnerable human life from
abortion, abandonment, experimentation, and all violations. Fill us with
reverence for the moment of your Incarnation in Nazareth when the Word became
flesh. Amen.
Lk
1:15, 30-44; '94 CCC pass. 717, 486,
495
FEAST
OF THE ANNUNCIATION~MARCH 25TH~9 MONTHS BEFORE CHRISTMAS
The
pre-Gregorian New Year’s Day once named for Christ's conception/Incarnation
(Conceptio Christi; Festum Incarnationis) is now the "Day of the Unborn
Child"!
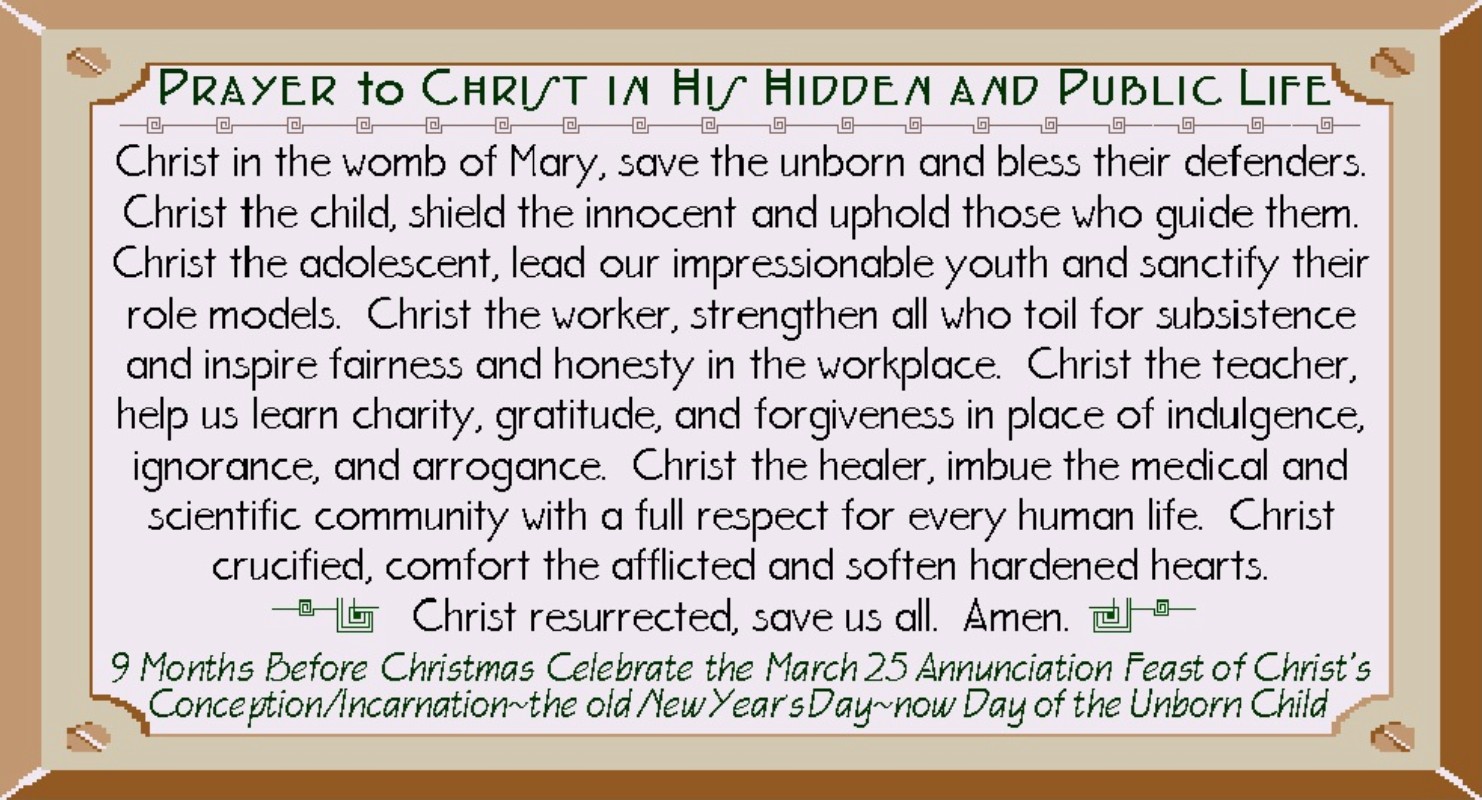
Our Prayer To Christ In
His Hidden And Public Life Banner Begins With Christ's Prenatal Life In
Context as Part of His "Hidden Life" ~ Includes a Notation on the
Significance of the Annunciation Feast Date
[NOTE:
In addition to the web applications described below, you can also
download an MS Word template to print the graphic as envelope seals/stickers or
top-fold invitation-size note-cards/postcards.
For stickers/seals right-click HERE
to save the file and print on Avery 48863 (or 5163-template) labels (available
at Wal-Mart and office supply stores), or try full sheet labels, or plain paper
with a sticker machine. For note-cards
right-click HERE
and save and print, then cut page in half between the images and fold each half
down; the same note-card file can print postcards--just print, then
flip/turn to print again in the blank half of sheet, and cut in quarters. For small signs (standard 8 1/2 x 11
in. size for bulletin boards, fliers, etc.) right-click HERE
and save and print (landscape orientation) on white paper or cardstock--click HERE
for instructions to make a stand-up tent-style sign for prayer card
displays and literature/refreshment tables.]
HTML Code: To insert the banner above linked or
un-linked directly with HTML, select/highlight the entire code-string in the
appropriate text box below by clicking/dragging your mouse, (or use Shift and
the cursor arrows) -- then right click and choose COPY. Then to insert, right click and PASTE. (See instructions
below for details).
HTML
code for linked version of the banner above is as follows:
<A
href="http://dayoftheunbornchild.com/"
target="new"><IMG height=206
src="http://dayoftheunbornchild.com/PrayerToChristInHisHiddenAndPublicLifeMar25AnnunciationBanner.jpg"
width=397 border=0></A>
HTML
code for un-linked version of the banner above is as follows:
<A><IMG height=206
src="http://dayoftheunbornchild.com/PrayerToChristInHisHiddenAndPublicLifeMar25AnnunciationBanner.jpg"
width=397 border=0></A>
Text
Used in Graphic (can be used with translation tools):
PRAYER
to CHRIST IN HIS HIDDEN AND PUBLIC LIFE
Christ
in the womb of Mary, save the unborn and bless their defenders. Christ the
child, shield the innocent and uphold those who guide them. Christ the
adolescent, lead our impressionable youth and sanctify their role models.
Christ the worker, strengthen all who toil for subsistence and inspire fairness
and honesty in the workplace. Christ the teacher, help us learn charity,
gratitude, and forgiveness in place of indulgence, ignorance, and arrogance.
Christ the healer, imbue the medical and scientific community with a full
respect for every human life. Christ crucified, comfort the afflicted and
soften hardened hearts. Christ resurrected, save us all. Amen.
9
MONTHS BEFORE CHRISTMAS CELEBRATE THE MARCH 25 ANNUNCIATION FEAST OF CHRIST’S
CONCEPTION/INCARNATION
~THE
OLD NEW YEAR’S DAY~NOW "DAY OF THE UNBORN CHILD!"
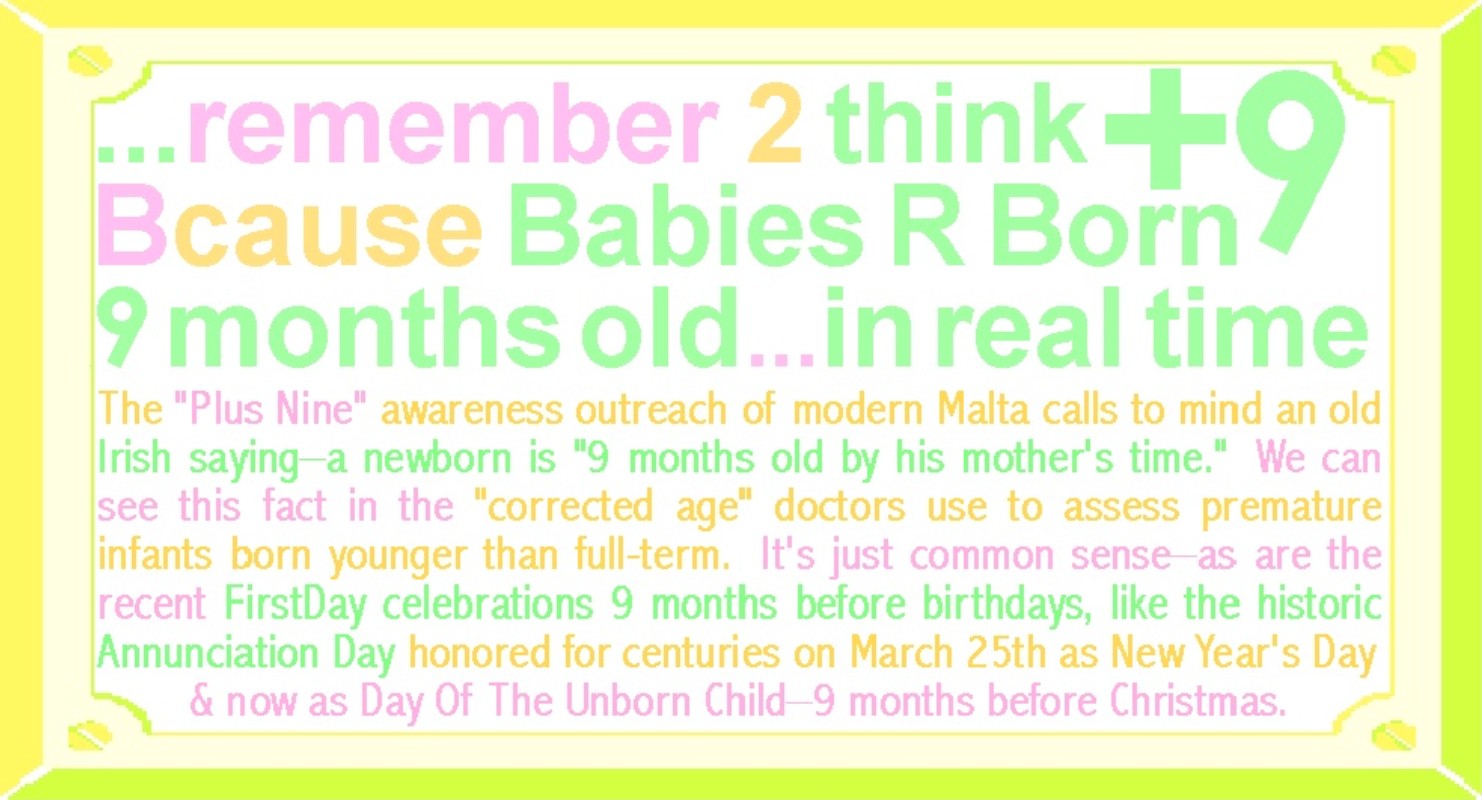
A Plus
Nine Banner in Sherbet Colors Invites Us To "Remember 2 Think
+9…Because Babies R Born 9 Months Old In Real Time" -- Text Includes a
Mention of FirstDay
Celebrations and Annunciation Day, Along With an Old Irish Saying That a
Newborn is "Nine Months Old By His Mother's Time."
[NOTE:
In addition to the web applications described below, you can also
download an MS Word template to print the graphic as envelope seals/stickers or
top-fold invitation-size note-cards/postcards.
For stickers/seals right-click HERE
to save the file and print on Avery 48863 (or 5163-template) labels (available
at Wal-Mart and office supply stores), or try full sheet labels, or plain paper
with a sticker machine. For note-cards
right-click HERE
and save and print, then cut page in half between the images and fold each half
down; the same note-card file can print postcards--just print, then
flip/turn to print again in the blank half of sheet, and cut in quarters. For small signs (standard 8 1/2 x 11
in. size for bulletin boards, fliers, etc.) right-click HERE
and save and print (landscape orientation) on white paper or cardstock--click HERE
for instructions to make a stand-up tent-style sign for prayer card
displays and literature/refreshment tables.]
HTML Code: To insert the banner above linked or
un-linked directly with HTML, select/highlight the entire code-string in the
appropriate text box below by clicking/dragging your mouse, (or use Shift and
the cursor arrows) -- then right click and choose COPY. Then to insert, right click and PASTE. (See instructions
below for details).
HTML
code for linked version of the banner above is as follows:
<A
href="http://dayoftheunbornchild.com/"
target="new"><IMG height=206
src="http://dayoftheunbornchild.com/PlusNine_Newborns9monthsOldInRealTime_FirstDaysBanner.jpg"
width=397 border=0></A>
HTML
code for un-linked version of the banner above is as follows:
<A><IMG height=206
src="http://dayoftheunbornchild.com/PlusNine_Newborns9monthsOldInRealTime_FirstDaysBanner.jpg"
width=397 border=0></A>
Text
Used in Graphic (can be used with translation tools):
REMEMBER
TO THINK +9
BECAUSE
BABIES ARE BORN
9
MONTHS OLD...IN REAL TIME
The
"Plus Nine" awareness outreach of modern Malta calls to mind an old
Irish saying a newborn is "9 months old by his mother's time." We can see this fact in the "corrected
age" doctors use to assess premature infants born younger than
full-term. It's just common sense–as
are the recent FirstDay celebrations 9 months before birthdays, like the
historic Annunciation Day honored for centuries on March 25th as New Year's Day
and now as "Day Of The Unborn Child" 9 months before Christmas.
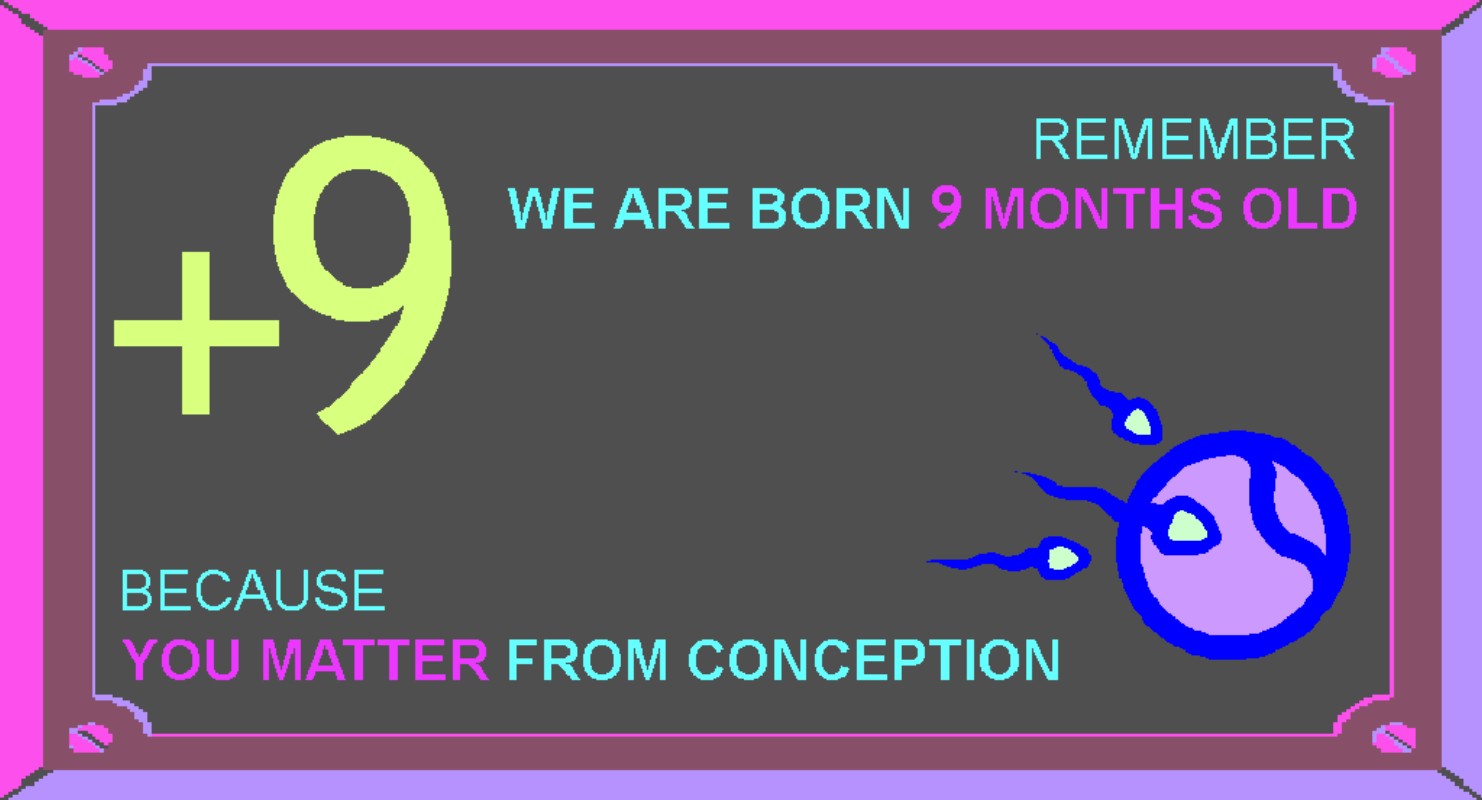
The Plus-Nine--Remember We Are Born 9 Months
Old" BlackLight Banner Adds the Positive Message "You Matter From
Conception" in Florescent-Glow Colors.
[NOTE: In addition to the web applications
described below, you can also download an MS Word template to print the graphic
as envelope seals/stickers or top-fold invitation-size
note-cards/postcards. For stickers/seals
right-click HERE
to save the file and print on Avery 48863 (or 5163-template) labels (available
at Wal-Mart and office supply stores), or try full sheet labels, or plain paper
with a sticker machine. For note-cards
right-click HERE
and save and print, then cut page in half between the images and fold each half
down; the same note-card file can print postcards--just print, then
flip/turn to print again in the blank half of sheet, and cut in quarters. For small signs (standard 8 1/2 x 11
in. size for bulletin boards, fliers, etc.) right-click HERE
and save and print (landscape orientation) on white paper or cardstock--click HERE
for instructions to make a stand-up tent-style sign for prayer card
displays and literature/refreshment tables.]
HTML Code: To insert the banner above linked or
un-linked directly with HTML, select/highlight the entire code-string in the
appropriate text box below by clicking/dragging your mouse, (or use Shift and
the cursor arrows) -- then right click and choose COPY. Then to insert, right click and PASTE. (See instructions
below for details).
HTML
code for linked version of the banner above is as follows:
<A
href="http://dayoftheunbornchild.com/"
target="new"><IMG height=206
src="http://dayoftheunbornchild.com/Plus9_YouMatterFromConception_BannerBlackLightDesign.jpg"
width=397 border=0></A>
HTML
code for un-linked version of the banner above is as follows:
<A><IMG height=206
src="http://dayoftheunbornchild.com/Plus9_YouMatterFromConception_BannerBlackLightDesign.jpg"
width=397 border=0></A>
Text
Used in Graphic (can be used with translation tools):
+9: Remember, We Are Born 9 Months Old–Because
You Matter, From Conception–PLUS NINE
Our Happy FirstDay Banner Presents a Simple Greeting and
Positive Message to Celebrate a FirstDay 9 Months Before a BirthDay in Cheerful
Colors with an Acorn Motif

[NOTE:
In addition to the web applications described below, you can also
download an MS Word template to print the graphic as envelope seals/stickers or
top-fold invitation-size note-cards/postcards.
For stickers/seals right-click HERE
to save the file and print on Avery 48863 (or 5163-template) labels (available
at Wal-Mart and office supply stores), or try full sheet labels, or plain paper
with a sticker machine. For note-cards
right-click HERE
and save and print, then cut page in half between the images and fold each half
down; the same note-card file can print postcards--just print, then
flip/turn to print again in the blank half of sheet, and cut in quarters. For small signs (standard 8 1/2 x 11
in. size for bulletin boards, fliers, etc.) right-click HERE and save
and print (landscape orientation) on white paper or cardstock--click HERE
for instructions to make a stand-up tent-style sign for prayer card
displays and literature/refreshment tables.]
HTML Code: To insert the banner above linked or
un-linked directly with HTML, select/highlight the entire code-string in the
appropriate text box below by clicking/dragging your mouse, (or use Shift and
the cursor arrows) -- then right click and choose COPY. Then to insert, right click and PASTE. (See instructions
below for details).
HTML
code for linked version of the banner above is as follows:
<A
href="http://dayoftheunbornchild.com/"
target="new"><IMG height=206
src="http://dayoftheunbornchild.com/HappyFirstDayBannerCelebrate9MosBeforeBirthDay.jpg"
width=397 border=0></A>
HTML
code for un-linked version of the banner above is as follows:
<A><IMG height=206 src="http://dayoftheunbornchild.com/HappyFirstDayBannerCelebrate9MosBeforeBirthDay.jpg"
width=397 border=0></A>
Text
Used in Graphic (can be used with translation tools):
Happy
FirstDay!
CELEBRATE!
9
Months
Before
Your
BirthDay
Our Celebrate Your
FirstDay…Just As You Do, Nine Months Before, On Your BirthDay Banner in a
Quiet Driftwood and Sun-Bleached Pastels Palette Serves as a Gentle Invitation
to this Yearly Practice ~ Includes the text: "Like the tiny plant that
rests inside a seed, we begin our lives small and in secret, hidden from the
eyes of the world. "
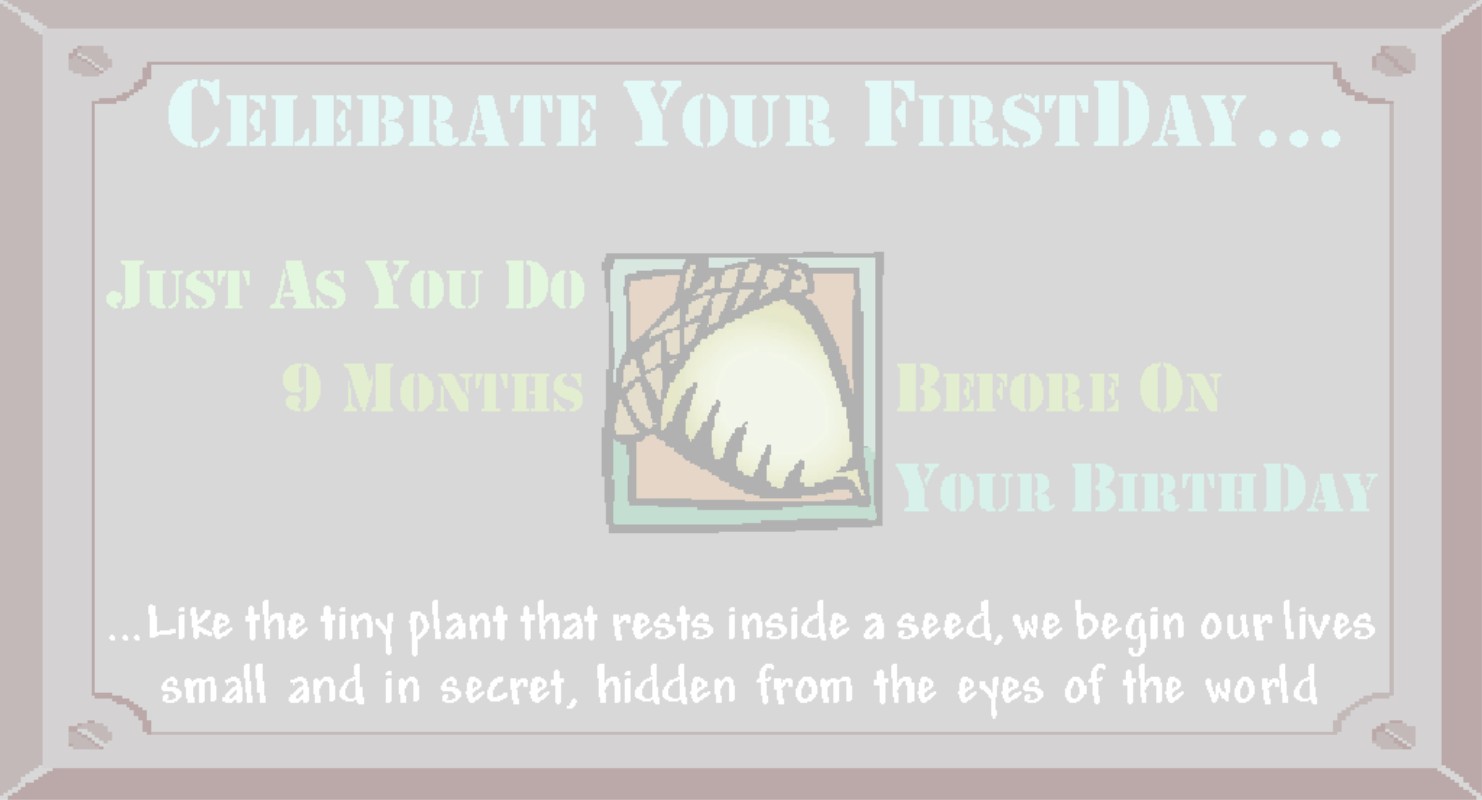
[NOTE:
In addition to the web applications described below, you can also
download an MS Word template to print the graphic as envelope seals/stickers or
top-fold invitation-size note-cards/postcards.
For stickers/seals right-click HERE
to save the file and print on Avery 48863 (or 5163-template) labels (available
at Wal-Mart and office supply stores), or try full sheet labels, or plain paper
with a sticker machine. For note-cards
right-click HERE
and save and print, then cut page in half between the images and fold each half
down; the same note-card file can print postcards--just print, then
flip/turn to print again in the blank half of sheet, and cut in quarters. For small signs (standard 8 1/2 x 11
in. size for bulletin boards, fliers, etc.) right-click HERE
and save and print (landscape orientation) on white paper or cardstock--click HERE
for instructions to make a stand-up tent-style sign for prayer card
displays and literature/refreshment tables.]
HTML Code: To insert the banner above linked or
un-linked directly with HTML, select/highlight the entire code-string in the
appropriate text box below by clicking/dragging your mouse, (or use Shift and
the cursor arrows) -- then right click and choose COPY. Then to insert, right click and PASTE. (See instructions
below for details).
HTML
code for linked version of the banner above is as follows:
<A
href="http://dayoftheunbornchild.com/"
target="new"><IMG height=206
src="http://dayoftheunbornchild.com/HappyFirstDay9MosB4BirthdayBannerWithSeedSimile.jpg"
width=397 border=0></A>
HTML
code for un-linked version of the banner above is as follows:
<A><IMG height=206
src="http://dayoftheunbornchild.com/HappyFirstDay9MosB4BirthdayBannerWithSeedSimile.jpgwidth=397
border=0></A>
Text
Used in Graphic (can be used with translation tools):
CELEBRATE
YOUR FIRST-DAY ...
Just
As You Do
9
Months Before On
Your
Birth-Day
...
Like the tiny plant that rests inside a seed, we begin our lives small and in
secret, hidden from the eyes of the world
Our Celebrate FirstDays
Like BirthDays Banner in a Bold Splash of Caribbean Colors Gives a Short
But Sweet Explanation of How to Celebrate a First Day--Using March 25 and
December 25 as an Example of Choosing the Day 9 Months Before a Birthday
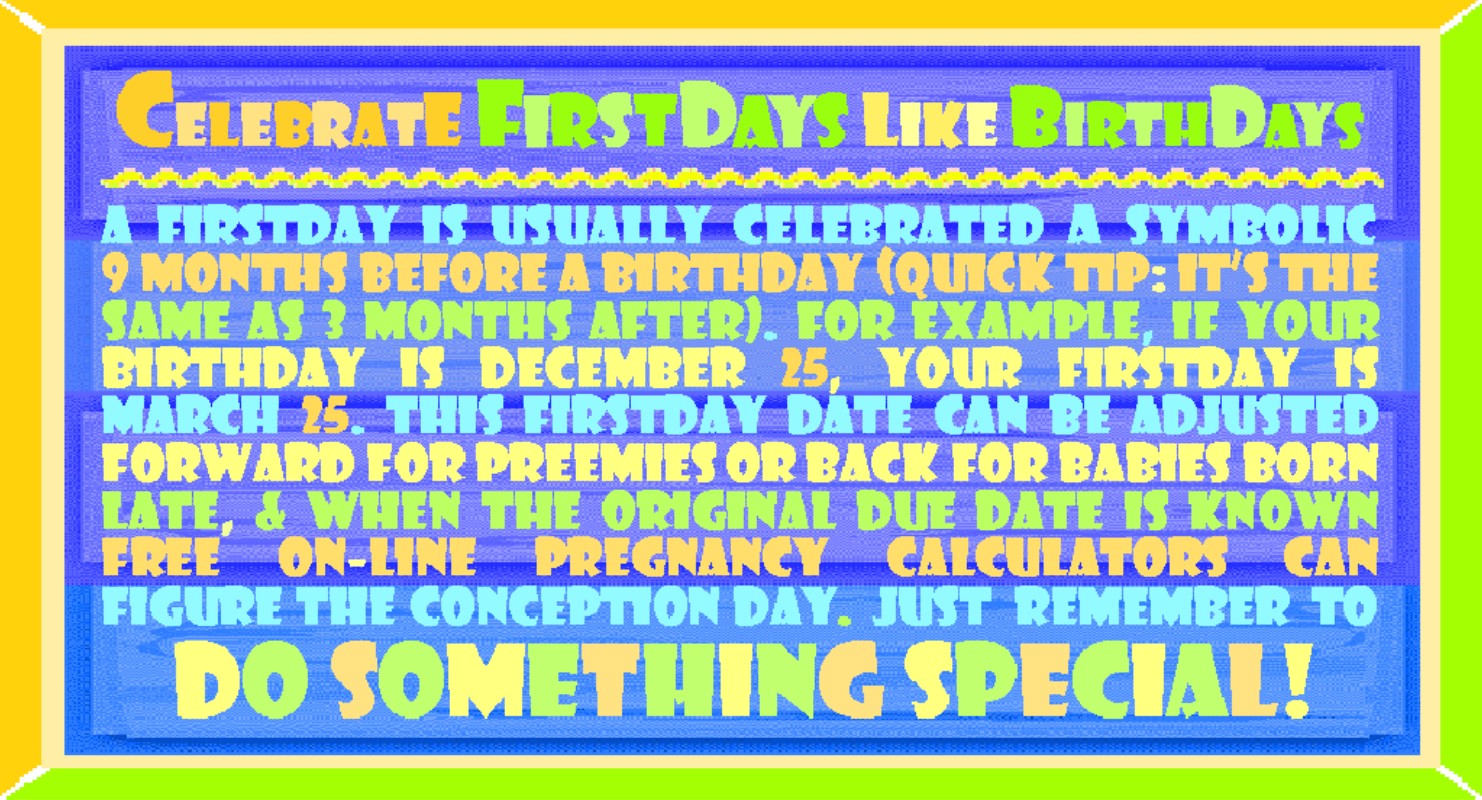
[NOTE: In addition to the web applications
described below, you can also download an MS Word template to print the graphic
as envelope seals/stickers or top-fold invitation-size
note-cards/postcards. For stickers/seals
right-click HERE
to save the file and print on Avery 48863 (or 5163-template) labels (available
at Wal-Mart and office supply stores), or try full sheet labels, or plain paper
with a sticker machine. For note-cards
right-click HERE
and save and print, then cut page in half between the images and fold each half
down; the same note-card file can print postcards--just print, then
flip/turn to print again in the blank half of sheet, and cut in quarters. For small signs (standard 8 1/2 x 11
in. size for bulletin boards, fliers, etc.) right-click HERE
and save and print (landscape orientation) on white paper or cardstock--click HERE
for instructions to make a stand-up tent-style sign for prayer card
displays and literature/refreshment tables.]
HTML Code: To insert the banner above linked or
un-linked directly with HTML, select/highlight the entire code-string in the
appropriate text box below by clicking/dragging your mouse, (or use Shift and
the cursor arrows) -- then right click and choose COPY. Then to insert, right click and PASTE. (See instructions
below for details).
HTML
code for linked version of the banner above is as follows:
<A
href="http://dayoftheunbornchild.com/"
target="new"><IMG height=206
src="http://dayoftheunbornchild.com/CelebrateFirstDaysLikeBirthdaysBannerWithInfoInCaribbeanColors.jpg"
width=397 border=0></A>
HTML
code for un-linked version of the banner above is as follows:
<A><IMG height=206
src="http://dayoftheunbornchild.com/CelebrateFirstDaysLikeBirthdaysBannerWithInfoInCaribbeanColors.jpg"
width=397 border=0></A>
Text
Used in Graphic (can be used with translation tools):
CELEBRATE
FirstDays LIKE BirthDays!
A
FirstDay is usually celebrated a symbolic 9 months before a birthday (Quick
Tip: it’s the same as 3 months after).
For example, if your BirthDay is December 25, your FirstDay is March 25. This FirstDay date can be adjusted Forward
for preemies or back for babies born late, & when the original due date is
known, free on-line pregnancy calculators can figure the conception day. Just remember to:
DO
SOMETHING SPECIAL!
Our Acorn & Oak
Tree--Happy First Day/+9 Banner Uses the Botany Lessons We All Learned in
School as a Common Starting Point to Promote "First Day" Celebrations
and "Plus Nine" Awareness
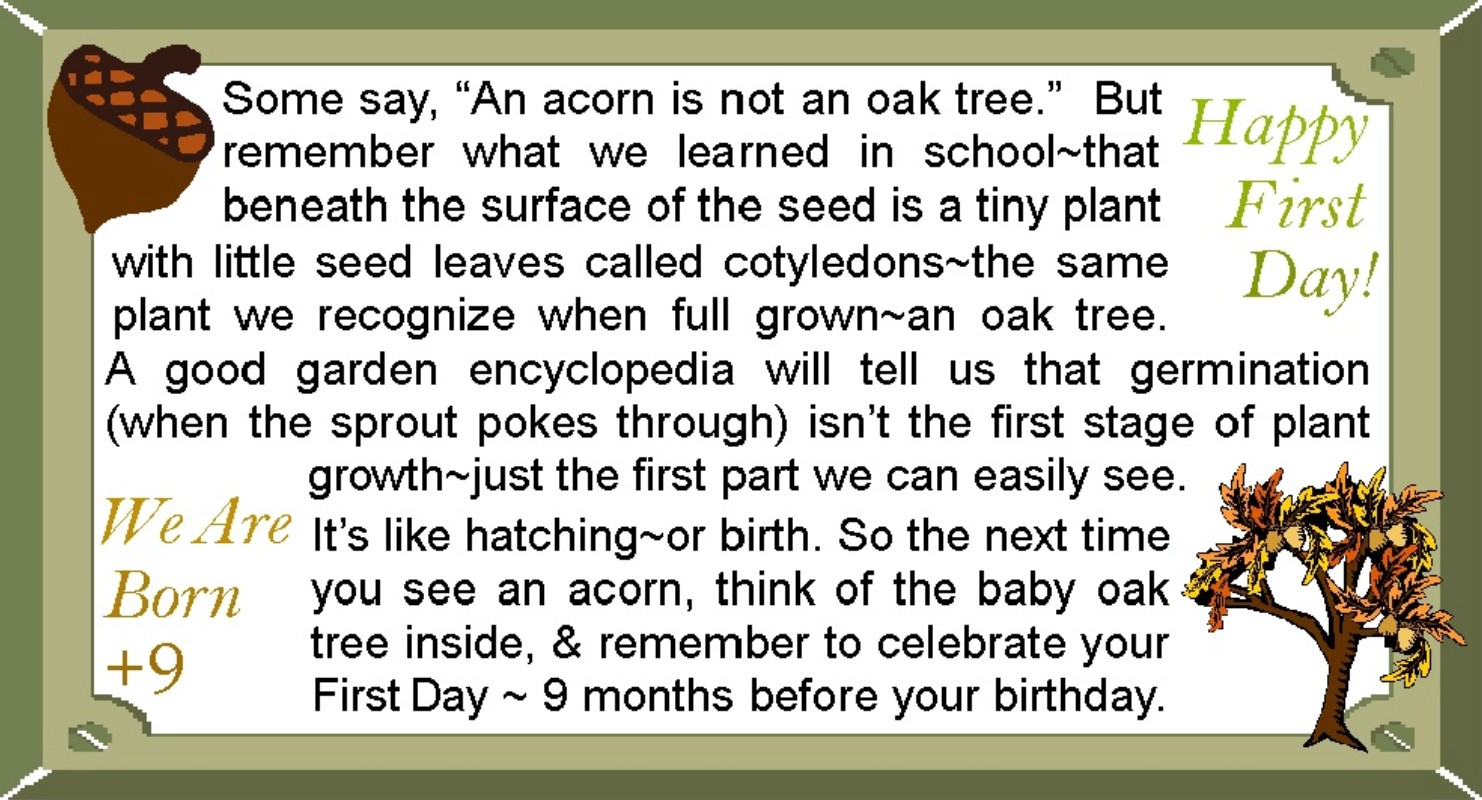
[NOTE:
In addition to the web applications described below, you can also
download an MS Word template to print the graphic as envelope seals/stickers or
top-fold invitation-size note-cards/postcards.
For stickers/seals right-click HERE
to save the file and print on Avery 48863 (or 5163-template) labels (available
at Wal-Mart and office supply stores), or try full sheet labels, or plain paper
with a sticker machine. For note-cards
right-click HERE
and save and print, then cut page in half between the images and fold each half
down; the same note-card file can print postcards--just print, then
flip/turn to print again in the blank half of sheet, and cut in quarters. For small signs (standard 8 1/2 x 11
in. size for bulletin boards, fliers, etc.) right-click HERE and
save and print (landscape orientation) on white paper or cardstock--click HERE
for instructions to make a stand-up tent-style sign for prayer card
displays and literature/refreshment tables.]
HTML Code: To insert the banner above linked or
un-linked directly with HTML, select/highlight the entire code-string in the
appropriate text box below by clicking/dragging your mouse, (or use Shift and
the cursor arrows) -- then right click and choose COPY. Then to insert, right click and PASTE. (See instructions
below for details).
HTML
code for linked version of the banner above is as follows:
<A
href="http://dayoftheunbornchild.com/" target="new"><IMG
height=206
src="http://dayoftheunbornchild.com/AcornAndOakTreeHappyFirstDayWeAreBornPlus9_Banner.jpg"
width=397 border=0></A>
HTML
code for un-linked version of the banner above is as follows:
<A><IMG height=206
src="http://dayoftheunbornchild.com/AcornAndOakTreeHappyFirstDayWeAreBornPlus9_Banner.jpg"
width=397 border=0></A>
Text
Used in Graphic (can be used with translation tools):
Some
say, "An acorn is not an oak tree."
But remember what we learned in school–that beneath the surface of the
seed is a tiny plant seed with little seed leaves called cotyledons–the same
plant we recognize when full grown–an oak tree. A good garden encyclopedia will tell us that germination (when
the sprout pokes through) isn’t the first stage of plant growth–just the first
part we can easily see. It’s like
hatching–or birth. So the next time you
see an acorn, think of the baby oak tree inside, and remember to celebrate your
First Day ~ 9 months before your birthday.
Happy FirstDay! We Are Born +9
Our Count From
Conception--Because You Count From Conception Banner Shows Children the
Value of Their Prenatal Lives With a Colorful Countdown from Their FirstDay to
Their BirthDay Encouraging Celebration of Both Dates and Awareness of the
#Plus9 Idea
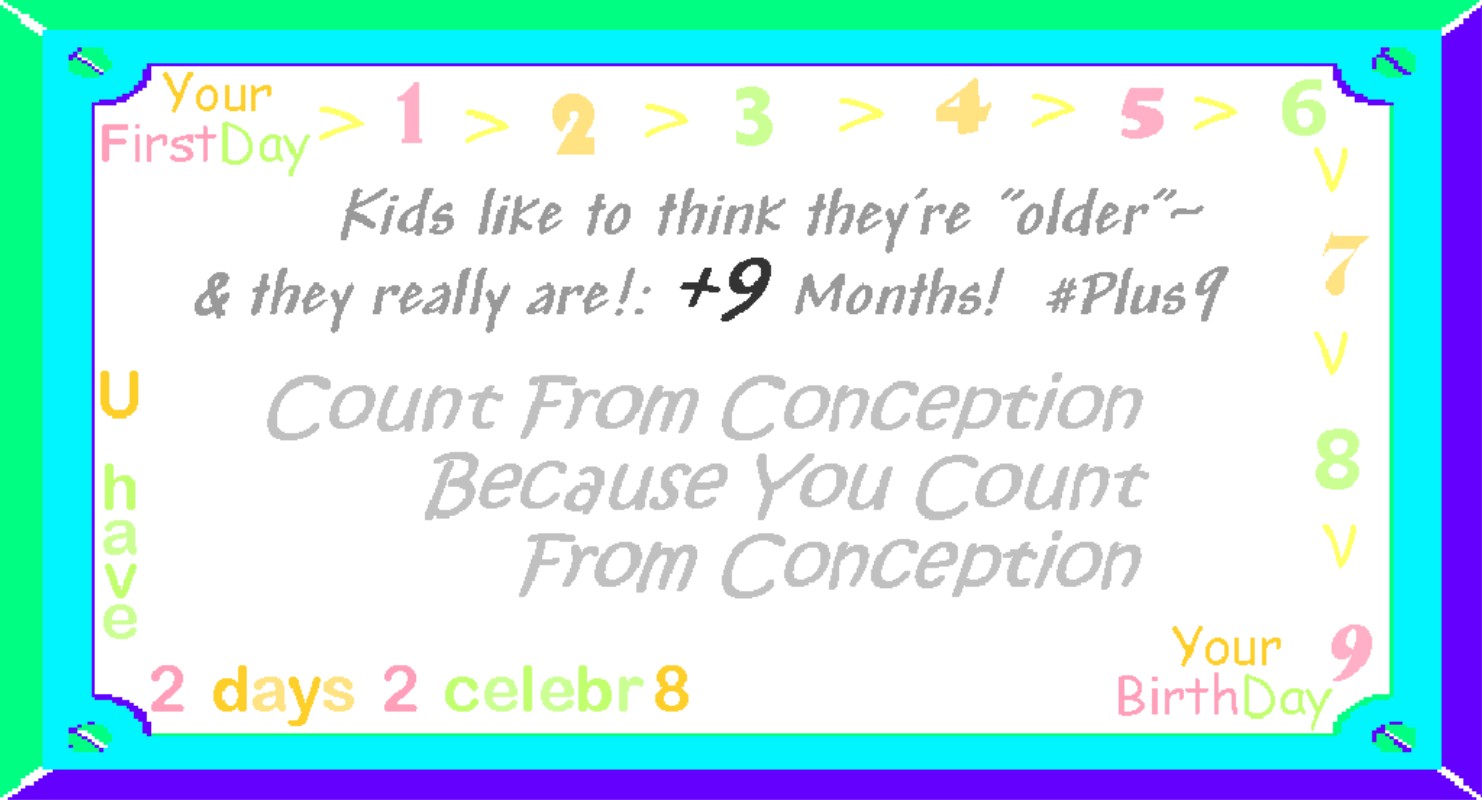
[NOTE: In addition to the web applications
described below, you can also download an MS Word template to print the graphic
as envelope seals/stickers or top-fold invitation-size
note-cards/postcards. For stickers/seals
right-click HERE
to save the file and print on Avery 48863 (or 5163-template) labels (available
at Wal-Mart and office supply stores), or try full sheet labels, or plain paper
with a sticker machine. For note-cards
right-click HERE
and save and print, then cut page in half between the images and fold each half
down; the same note-card file can print postcards--just print, then
flip/turn to print again in the blank half of sheet, and cut in quarters. For small signs (standard 8 1/2 x 11
in. size for bulletin boards, fliers, etc.) right-click HERE
and save and print (landscape orientation) on white paper or cardstock--click HERE
for instructions to make a stand-up tent-style sign for prayer card
displays and literature/refreshment tables.]
HTML Code: To insert the banner above linked or
un-linked directly with HTML, select/highlight the entire code-string in the
appropriate text box below by clicking/dragging your mouse, (or use Shift and
the cursor arrows) -- then right click and choose COPY. Then to insert, right click and PASTE. (See instructions
below for details).
HTML
code for linked version of the banner above is as follows:
<A
href="http://dayoftheunbornchild.com/"
target="new"><IMG height=206
src="http://dayoftheunbornchild.com/Plus9_FirstDays_CountFromConceptionBecauseYouCountFromConception_Banner.jpg"
width=397 border=0></A>
HTML
code for un-linked version of the banner above is as follows:
<A><IMG height=206
src="http://dayoftheunbornchild.com/Plus9_FirstDays_CountFromConceptionBecauseYouCountFromConception_Banner.jpg"
width=397 border=0></A>
Text
Used in Graphic (can be used with translation tools):
Kids
like to think they’re "older"–
and
they really are ! : +9 Months! #Plus9
COUNT
FROM CONCEPTION
BECAUSE
YOU COUNT
FROM
CONCEPTION
You
Have 2 Days To Celebrate: Your FirstDay
>1>2>3>4>5>6>7>8>9 Your BirthDay
The April 7 Annunciation
Banner Raises Awareness of the Alternate Date Used Each Year By Julian Calendar
and Armenian Orthodox Churches, Plus Those Churches That May Transfer the Feast
to This Day In Specific Years When There is a Lent/Easter Conflict--See The Ecumenical
Celebration Page for More on the April 7th Annunciation Tradition
![]()
[NOTE: In addition to the web applications
described below, you can also download an MS Word template to print the graphic
as envelope seals/stickers or top-fold invitation-size
note-cards/postcards. For stickers/seals
right-click HERE
to save the file and print on Avery 48863 (or 5163-template) labels (available
at Wal-Mart and office supply stores), or try full sheet labels, or plain paper
with a sticker machine. For note-cards
right-click HERE
and save and print, then cut page in half between the images and fold each half
down; the same note-card file can print postcards--just print, then
flip/turn to print again in the blank half of sheet, and cut in quarters. For small signs (standard 8 1/2 x 11
in. size for bulletin boards, fliers, etc.) right-click HERE
and save and print (landscape orientation) on white paper or cardstock--click HERE
for instructions to make a stand-up tent-style sign for prayer card
displays and literature/refreshment tables.]
HTML Code: To insert the banner above linked or
un-linked directly with HTML, select/highlight the entire code-string in the
appropriate text box below by clicking/dragging your mouse, (or use Shift and
the cursor arrows) -- then right click and choose COPY. Then to insert, right click and PASTE. (See instructions
below for details).
HTML
code for linked version of the banner above is as follows:
<A
href="http://dayoftheunbornchild.com/"
target="new"><IMG height=206
src="http://dayoftheunbornchild.com/Apr7AltAnnunciationDateBanner4JulianCalendarAndArmenianPlusChurchesThatTransfer.jpg"
width=397 border=0></A>
HTML
code for un-linked version of the banner above is as
follows:
<A><IMG height=206
src="http://dayoftheunbornchild.com/Apr7AltAnnunciationDateBanner4JulianCalendarAndArmenianPlusChurchesThatTransfer.jpg"
width=397 border=0></A>
Text
Used in Graphic (can be used with translation tools):
NOTICE:
OUR "ANNUNCIATION" WILL BE APRIL 7
Generally
celebrated March 25th, 9 months before Dec. 25, the Annunciation Feast of
Christ’s Conception is observed April 7th not only by churches that celebrate
the Jan. 7 old calendar Christmas, but also Armenian Orthodox 9 months minus
one day before their Jan. 6 combined Christmas/Theophany feast. Moreover, in years with Lent/Easter
conflicts many churches transfer their regular March 25th feast (honored for
centuries as the old New Year’s Day) to another day that month or the
next. So for all those who observe the
day this April...
WE JOIN IN CELEBRATING THE INCARNATION
The Alternate Date Banner
Below Is Used For 2024 When Catholic and Other Churches Transfer The
Annunciation Feast Date to April 8th Due to a Lent/Easter Conflict with the
Usual March 25th Date. As the Rules
Used by Catholic, Episcopalian, Anglican, and Lutheran Churches On How and When
to Move the Date Vary (See The Ecumenical
Celebration Page for Details), Banners for All The Most Likely Dates From
Early March to Early April Will Be Included in the Photos Section of Our Page
at facebook.com/AnnunciationDayMarch25 -- and Banners For Transfer
Dates To Be Used in the Current Year Will Also Be Tweeted Via @March25info as the Day Approaches. (Files to print note cards, sticker labels, and a sign are only
available for the April 7th alternate date banner above, which can be used
every year for Julian calendar churches and others that use this date for the
Annunciation -- if your church has transferred the feast to different date you
are welcome to use the files as templates and replace the images by
right-clicking/saving and inserting the desired Facebook page graphic to print
your own, or simply use them on the web as e-greetings).
![]()
HTML Code: To insert the banner above linked or
un-linked directly with HTML, select/highlight the entire code-string in the
appropriate text box below by clicking/dragging your mouse, (or use Shift and the
cursor arrows) -- then right click and choose COPY. Then to insert, right click and PASTE. (See instructions below for
details).
HTML
code for linked version of the banner above is as follows:
<A href="http://dayoftheunbornchild.com/"
target="new"><IMG height=206
src="http://dayoftheunbornchild.com/AnnunciationTransferredDateBanner.jpg"
width=397 border=0></A>
HTML
code for un-linked version of the banner above is as follows:
<A><IMG height=206 src="http://dayoftheunbornchild.com/AnnunciationTransferredDateBanner.jpg"
width=397 border=0></A>
The "What" and "Why" of Web Banners
Basically, a banner is an image with text and/or graphics that attracts attention far more than plain text alone. A web banner can be used in blogs, your personal websites, or in e-mail "signatures" so it will be included at the bottom of everything you send out. Banners in e-mail are particularly effective as they have the potential to "travel" via forwards. The banner image can be saved/downloaded as a picture to be used in e-mails and websites as with photos, but usually it is linked to the homepage of a website that provides more information. This hyperlinked (clickable) "banner" is created either directly with an HTML code that links the banner image to the website, or by downloading and inserting the image and then linking it to the website. The codes on this page offer both a linked and non-linked option. (The codes include the URL location/filename of the banner graphic, the desired size/proportion of the banner, and the linked option also includes the homepage URL for the link.)
Using the Banner in your E-mails, Website,
and Blogging:
An unlinked banner can be inserted with an html code, or by right-clicking the banner image to save/download it as a picture and then using it as you would a photo. A linked banner can be created in two ways -- by directly inserting the HTML code, or by inserting just the banner image and then linking it to the desired homepage in a separate step by adding/inserting a hyperlink. Website software allows both methods. A blog or e-mail signature may only have one option, and some may only allow insertion of an unlinked picture/graphic you have previously saved. If your program allows only the unlinked image, you can type the full text of the website address below the picture once inserted -- http://dayoftheunbornchild.com -- most programs (even those that only allow plain-text signatures) will automatically link the text of a complete web address.
"Add A Banner" Instructions
E-Mail Signatures (General Instructions):
Websites (General Instructions)
Blogs/Boards/Forums (Tips)
Adding Banners to E-mail Signatures -- General Instructions:
If you add a banner as a "signature" (sometimes called "custom stationery") in your settings options the banner will appear in every e-mail you compose (you may also be able to specify that it be included in forwards and replies). Most popular e-mail programs such as Hotmail/Outlook, Yahoo, Gmail, AOL, & Doteasy allow graphics to be used in e-mail signatures and you can change these seasonally.
General instructions for most programs: Use the help screens for your e-mail program -- specifically the settings for composing e-mail, which should include signatures. For most e-mail software/programs a signature is created/added by changing your "settings" or "options" and then choosing the "compose" and/or "personal e-mail signature" option. You will have to turn on the HTML option for the signature before pasting in one of the codes for the graphics on this page. The HTML option may be in a drop down menu with Plain and Rich Text options, or be indicated by a symbol such as less-than/more-than bracket < or > on/off toggles. Select HTML mode/format to turn on HTML mode and then to insert the graphic in your signature, paste in one of the codes below the graphics on this page.
Note: Some programs will allow you to copy and paste a
linked banner image into the Rich Text signature window (even if they don't
allow direct insertion of HTML code in signatures).
Rich Text mode alternate method: If your e-mail program doesn't have HTML but has a Rich Text option, you may be able to use this method: Turn on Rich Text mode, then right-click an image on this page to select copy, and then paste it in your e-mail signature settings window.
Insert Picture/File Signature method: If your e-mail signature won't accept these methods, you may be able to use the banner in your signature as an unlinked image (as with a photo), or insert the image and link it separately. In this case you will right click the banner image on this page and save the picture to your computer, and then place the image in the signature window with the insert "picture" or "file" option. If you used "insert picture" you may be able to hyperlink it in a separate step by clicking the image in the signature box and then clicking the link option to add our website address. If there is no link option, you can always add the website address -- http://dayoftheunbornchild.com -- under the banner image as a line of text. (Nearly all e-mail programs will automatically hyperlink a typed website address -- this will work even in signatures that allow plain text only.)
NOTE: If for any reason you need to delete the banner when composing a specific e-mail, in most programs you can just click on the banner in your compose window and then delete -- it will be deleted from only the e-mail you are sending.
A few e-mail programs only allow plain text signatures or no
signatures at all. However, nearly
all e-mail programs can receive, display and forward HTML, so you can create an
e-mail to use as a template with the "Reply" option as follows:
E-Mail Banner Template for programs with no signatures or
plain-text-only signatures:
Right-click a linked banner or e-card on this page and select "Copy" and then right click it again to save it to your desktop with the "save as" option.
Then open a new email and use the right-click paste option to paste the image into the window -- if the image will not paste into the window, try to insert it as a photo or in-line attachment, using insert options and the file you saved to desktop.
Then send this e-mail to your own e-mail address with an identifying subject line, and check your inbox to make sure it was received and that the graphic is included. Keep this e-mail in your inbox -- use your e-mail program's mark or flag option to mark it as important and keep it near the top. Then you can easily find and use it as your template whenever you want to send an e-mail that includes the banner -- simply use the "Reply" option and delete any unwanted reply-text between your new text and the graphic, and then type in your new "Subject" and "To" lines. First, send a test e-mail by typing your own e-mail address in the "To" field (or an alternate e-mail you use) -- make sure the graphic is received in your test e-mail (if not change your settings for how replies are sent so they include the full original message with graphics).
Add Our Banner to Your Website:
If you are comfortable editing your website in HTML mode, simply switch to HTML mode and insert the code in the body of your web page where you want it to appear. Save your HTML changes and check the banner's positioning -- you may want to select the banner and add a centering command or adjust its size/position. Upload your page and then visit your site to see if the banner/link is visible and working and is placed where you want it.
If you don't want to work directly in HTML, you can add the banner to your webpage as follows:
While connected to the Internet, right click the image at the top of this page to download/save it -- for location choose the folder where you keep the files for your website. Then open your webpage file with the program you use to edit it, and insert this picture/image file where you want it to appear. Once inserted, right-click the image to add a hyperlink -- http://dayoftheunbornchild.com -- then save your page, and upload both your edited webpage and the image file you saved.
Using a Banner in Blogs, Forums and Message
Boards:
Many blogs, on-line forums and message boards allow insertion of a graphic image or HTML code in posts -- some may allow you to include it in a personal "signature" so it will appear in all your posts. However, if you are posting in someone else's blog or board, this may require special permission from the administrator. If you are unsure of a particular forum's rules regarding posts that include graphics or HTML banners, please read the terms/guidelines for that blog/board or contact the administrator. If the blog only prohibits linked banners, use the code for an un-linked banner, or use the instructions for downloading/saving the banner image and inserting it as a picture.
Free Easy E-cards
Just send an E-mail to Mar25Dec25ecard@DayOfTheUnbornChild.com to have our dual-season e-card (scroll down to view this and other designs) sent straight to your inbox to forward to one or more of your e-mail contacts for the Annunciation in March or use it as your e-mail Christmas card to friends and family. The E-card section below also includes e-cards for Easter (and its link to March 25), Annunciation Day (2 versions with a carnation design), and an all-ages First-Day card for celebrating conception dates, as well as the Christmas/Annunciation E-card. For a New Year's Day card print the New Year's Day banner file for notecards, or use the graphic for e-greetings.
(Note: Your e-card should be received within a few days -- if not, make sure your e-mail filter is not catching it in the spam or junk folder, and adjust your safe sender, or whitelist to receive e-mails from the domain dayoftheunbornchild.com -- then try again.)
After you receive it, if you can't see the image you may see a prompting to display images from this address -- choose "always display" option if available.
When you click "forward" you may want to delete the "FW" subject and type your own -- you can also delete the header in the body of the e-mail and type your own greeting (this will personalize the card and make it look less like a forward).
Keep the e-mail in your inbox or move to a special e-mail folder to forward again for the next Christmas or Annunciation greeting. If you keep it in your inbox, your e-mail program may allow you to flag or mark it to keep it on top for future use.
Our Dual-Season E-card Links the
Annunciation to Christmas as "Happy HolyDays" (with an added reminder
of the greeting's real meaning). The
design encompasses both spring and winter.
Gold, bells, candles, ribbons and a table set with crystal are festive
for any occasion. The holly and
glistening tree trimmings evoke Christmas, while pink buds and a red-breasted
bird hint at the springtime feast of the Annunciation.
PRINT
VERSION -- CARDS/POSTCARDS: [In addition to the E-card applications, you
can also download an MS Word file to print this graphic as invitation-size
note-cards/postcards. For note-cards
right-click HERE
and save and print, then cut page in half between the images and fold each in
half; the same note-card file can print postcards--just print, then
flip/turn to print again in the blank half of sheet, and cut in quarters.]
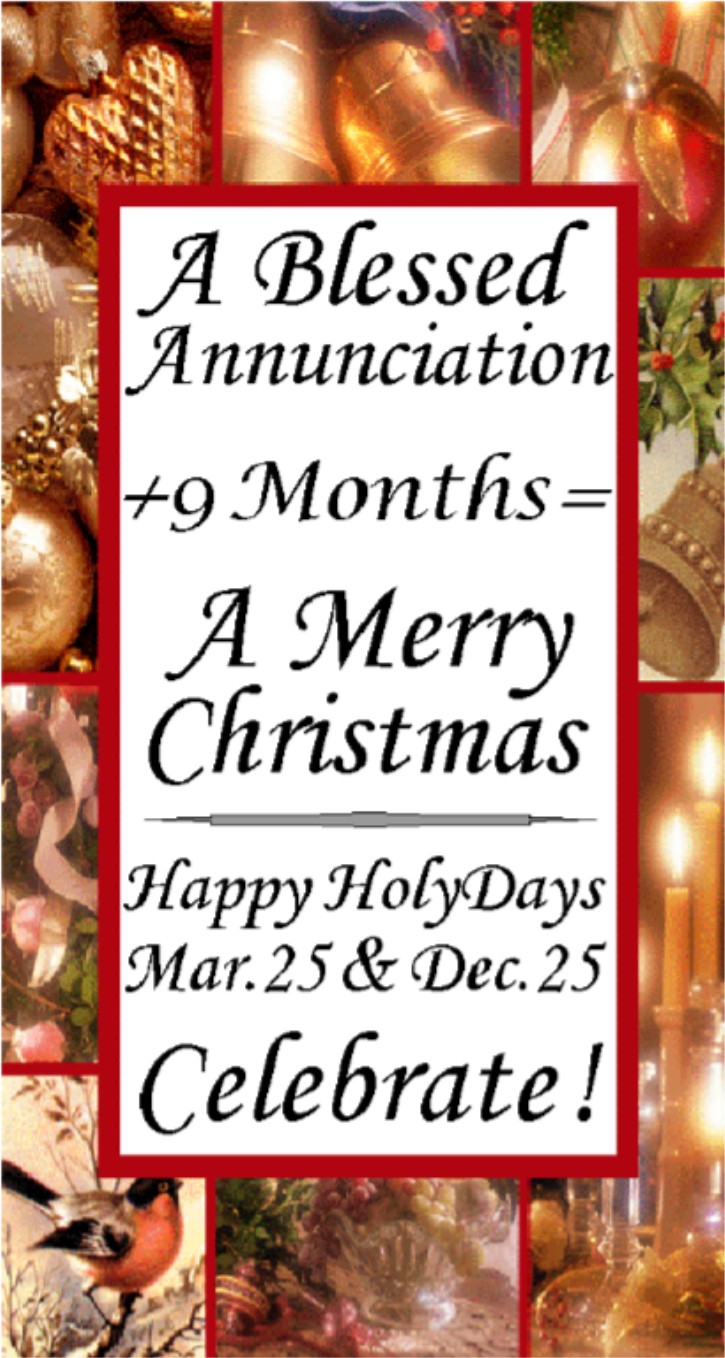
HTML Code: If you prefer to insert the e-card html code
yourself, linked or unlinked, select/highlight the entire code-string in the
appropriate text box below by clicking/dragging your mouse, (or use Shift and
the cursor arrows) -- then right click and choose COPY. Then to insert, right click and PASTE. (See instructions
above for details on how to use it (in e-mails for ex.).
HTML
code for linked version of the e-card above is as follows:
<A
href="http://dayoftheunbornchild.com/" target="new"><IMG
height=716
src="http://dayoftheunbornchild.com/ChristmasAnnunciationEcardForMar25Dec25.jpg"
width=400 border=0></A>
HTML
code for un-linked version of the e-card above is as follows:
<A><IMG height=716 src="http://dayoftheunbornchild.com/ChristmasAnnunciationEcardForMar25Dec25.jpg"
width=400 border=0></A>
Text
Used in Graphic (can be used with translation tools):
A
Blessed Annunciation
+ 9
Months =
A
Merry Christmas
HAPPY
HOLY DAYS
Mar.25
& Dec.25
CELEBRATE!
Easter's Annunciation/Good Friday Connection E-Card -- A Timely Opportunity to Share Information on the March 25th Feast in the Same Lent/Eastertide Season it is Celebrated. Easter is also the fourth most popular occasion for greeting cards, making it ideal for faith-oriented posting and sharing.
PRINT
VERSION -- CARDS/POSTCARDS: [In
addition to the E-card applications, you can also download an MS Word file to
print this graphic as invitation-size note-cards/postcards. For note-cards right-click HERE
and save and print, then cut page in half between the images and fold each in
half; the same note-card file can print postcards--just print, then flip/turn
to print again in the blank half of sheet, and cut in quarters.]
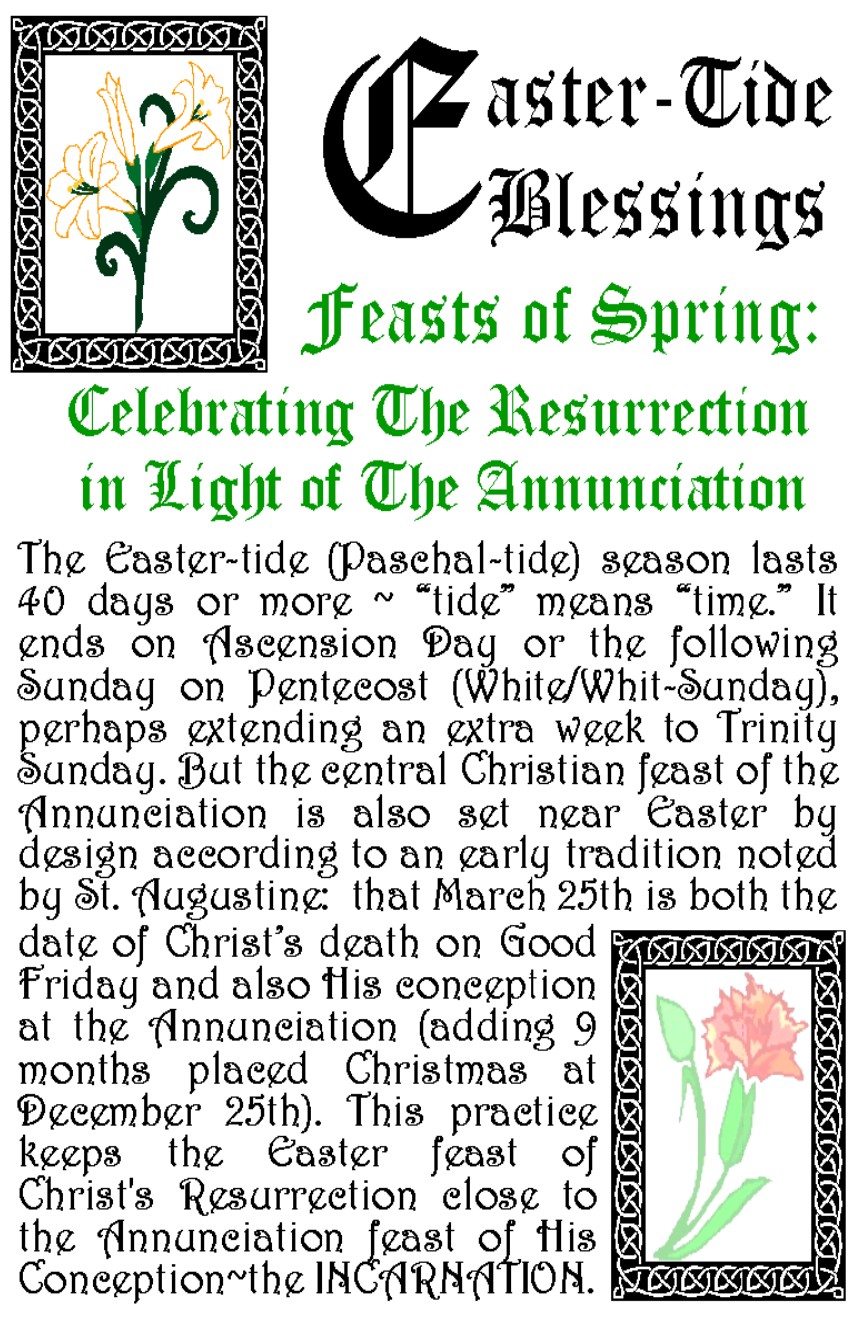
HTML Code: If you prefer to insert the e-card html code
yourself, linked or unlinked, select/highlight the entire code-string in the
appropriate text box below by clicking/dragging your mouse, (or use Shift and
the cursor arrows) -- then right click and choose COPY. Then to insert, right click and PASTE. (See instructions
above for details on how to use it (in e-mails for ex.).
HTML
code for linked version of the e-card above is as follows:
<A
href="http://dayoftheunbornchild.com/"
target="new"><IMG height=716
src="http://dayoftheunbornchild.com/EasterEcardWithAnnunciationGoodFridayConnection.jpg"
width=400 border=0></A>
HTML
code for un-linked version of the e-card above is as follows:
<A><IMG height=716
src="http://dayoftheunbornchild.com/EasterEcardWithAnnunciationGoodFridayConnection.jpg"
width=400 border=0></A>
Text
Used in Graphic (can be used with translation tools):
Easter-Tide
Blessings
Feasts
of Spring:
Celebrating
The Resurrection
in
Light of The Annunciation
The
Easter-tide (Paschal-tide) season lasts 40 days or more ~ "tide"
means "time." It ends on
Ascension Day or the following Sunday on Pentecost (White/Whit-Sunday), perhaps
extending an extra week to Trinity Sunday.
But the central Christian feast of the Annunciation is also set near
Easter by design according to an early tradition noted by St. Augustine: that March 25th is both the date of Christ’s
death on Good Friday and also His conception at the Annunciation (adding 9
months placed Christmas at December 25th).
This practice keeps the Easter feast of Christ's Resurrection close to
the Annunciation feast of His Conception~the INCARNATION.
Symbolic Floral Cards Below Feature The
Carnation (Meaning Flesh-Colored Flower) For The Annunciation Feast Of The
Incarnation--When The Word Became Flesh.
To Send These Ecards Please See Codes Below & Instructions, Or send an E-mail to Mar25Dec25ecard@DayOfTheUnbornChild.com (when the reply to
your e-mail arrives delete any text/graphics you don't want and forward to
family/friends in your email-address-book contact list, adding your own
greeting if desired)
For more about using carnations to celebrate the March 25th feast, click this link to our "ideas" page.
PRINT
VERSION -- CARDS/POSTCARDS: [In addition to the E-card applications, you
can also download an MS Word file to print this graphic as invitation-size
note-cards/postcards. For note-cards,
right-click HERE and save and print, then
cut page in half between the images and fold each side in half; the same
note-card files can print postcards--just print, then flip/turn to print
again in the blank half of sheet, and cut in quarters.]
HTML Code: To use the html code for the e-card above,
linked or unlinked, select/highlight the entire code-string in the appropriate
text box below by clicking/dragging your mouse, (or use Shift and the cursor
arrows) -- then right click and choose COPY.
Then to insert, right click and PASTE.
(See instructions above for details on
how to use it (in e-mails for ex.).
HTML
code for linked version of the e-card above is as follows:
<A
href="http://dayoftheunbornchild.com/"
target="new"><IMG height=378 src="http://dayoftheunbornchild.com/AnnunciationBlessingsCarnationPhoto.JPG"
width=250 border=0></A>
HTML
code for un-linked version of the e-card above is as follows:
<A><IMG height=378
src="http://dayoftheunbornchild.com/AnnunciationBlessingsCarnationPhoto.JPG"
width=250 border=0></A>
Text
Used in Graphic (can be used with translation tools):
ANNUNCIATION
BLESSINGS
Feast
of The
INCARNATION
March
25
9
MONTHS BEFORE CHRISTMAS
PRINT
VERSION -- CARDS/POSTCARDS: [In addition to the E-card applications, you
can also download an MS Word file to print this graphic as invitation-size
note-cards/postcards. For note-cards,
right-click HERE and save and print, then cut
page in half between the images and fold each side in half; the same note-card
files can print postcards--just print, then flip/turn to print again in
the blank half of sheet, and cut in quarters.]

HTML Code: To use the html code for the e-card above,
linked or unlinked, select/highlight the entire code-string in the appropriate
text box below by clicking/dragging your mouse, (or use Shift and the cursor
arrows) -- then right click and choose COPY.
Then to insert, right click and PASTE.
(See instructions above for details on
how to use it -- in e-mails for ex.).
HTML
code for linked version of the e-card above is as follows:
<A
href="http://dayoftheunbornchild.com/"
target="new"><IMG height=378
src="http://dayoftheunbornchild.com/HappyAnnunciationCarnationGraphic.JPG"
width=250 border=0></A>
HTML
code for un-linked version of the e-card above is as follows:
<A><IMG height=378
src="http://dayoftheunbornchild.com/HappyAnnunciationCarnationGraphic.JPG"
width=250 border=0></A>
Text
Used in Graphic (can be used with translation tools):
Happy
Annunciation Day!
the
March 25th Feast of the
INCARNATION
(Christ's
Conception)
The
Old New Year's Day
9
Months Before Christmas
A Happy FirstDay Card for All Ages with Acorn Motif -- Send to Friends/Family 9 Months Before Their Birthdays -- for more info on celebrating FirstDays Click HERE.
PRINT
VERSION -- CARDS/POSTCARDS: [In addition to the E-card applications
below, you can also download an MS Word file to print this graphic as
invitation-size note-cards/postcards.
For note-cards, right-click HERE
and save and print, then cut page in half between the images and fold each side
in half; the same note-card files can print postcards--just print, then
flip/turn to print again in the blank half of sheet, and cut in quarters.]

HTML Code: If you prefer to insert the e-card html code
yourself, linked or unlinked, select/highlight the entire code-string in the appropriate
text box below by clicking/dragging your mouse, (or use Shift and the cursor
arrows) -- then right click and choose COPY.
Then to insert, right click and PASTE.
(See instructions above for details on
how to use it (in e-mails for ex.).
HTML
code for linked version of the e-card above is as follows:
<A
href="http://dayoftheunbornchild.com/"
target="new"><IMG height=716
src="http://dayoftheunbornchild.com/HappyFirstDayConceptionDateEcardWithAcornAndInfo.jpg"
width=400 border=0></A>
HTML
code for un-linked version of the e-card above is as follows:
<A><IMG height=716
src="http://dayoftheunbornchild.com/HappyFirstDayConceptionDateEcardWithAcornAndInfo.jpg"
width=400 border=0></A>
Text
Used in Graphic (can be used with translation tools):
Happy
FirstDay!
…Like
the tiny plant that rests inside a seed, we begin our lives small and in
secret, hidden from the eyes of the world
CELEBRATE
Your
Conception Date!
Each
year 9 Months Before your Birthday
or 266
days before your mom's original due date
Hint:
It's quicker & easier to count forward~
3
months after a full-term birthday or
99
days after the first due date
[To
return to home page click http://dayoftheunbornchild.com/ ]
Page
Updated 7/25/18